Italian Chocolate Hazelnut Tart
Italian chocolate hazelnut tart: It’s delicious for dessert!
Italian Chocolate Hazelnut Tart
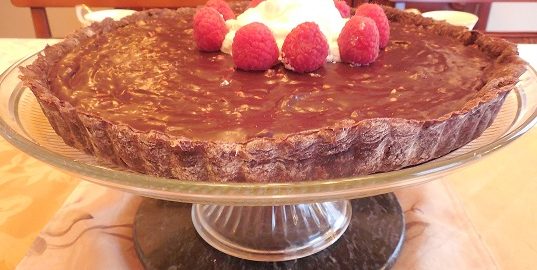
This Italian chocolate hazelnut tart (crostata) blends two classic Italian ingredients that go perfectly with one another to create a delicious, sweet end to any meal. I think you will agree that a slice of this chocolate tart for dessert will add something special to any get-together or celebration. And it is very simple to make!
A basic, pre-baked pie crust and a no-bake filling of chocolate ganache, hazelnut spread, and real hazelnuts will turn into something special when combined. The filling is candy-like, similar to the flavored chocolate fillings found in truffle candies, so even a thin slice is very rich! Also included is an easy method for homemade whipped cream.
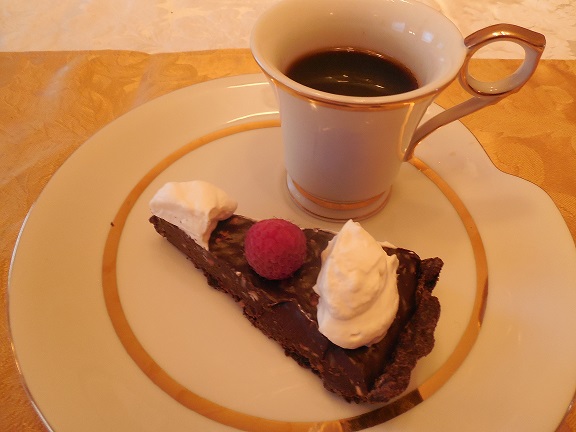
Try a slice of our chocolate hazelnut tart topped with a dollop of freshly made whipped cream and see for yourself!
—Kathryn Occhipinti
Make the tart pastry:
Chocolate Pasta Frolla
Ingredients:
1 1/2 cups all-purpose flour
¼ cup unsweetened cocoa powder (Dutch processed)
1/3 cup sugar
¼ tsp salt
1 stick (8 Tbsps) cold, unsalted butter, sliced into 1 Tb pieces
1 egg + 1 egg yolk, lightly mixed together
1 tsp vanilla
about 6–8 Tbsps of chilled water
Method to make the tart crust:
Sift together the flour, cocoa powder, sugar, and salt.
Cut in the butter with a pastry blender or a fork or rub between your thumb and the tips of your fingers to make small, flat, flakes of butter.
Mix the egg with the vanilla and then add to the dry ingredients. Add 5 Tbsp of chilled water. Mix all together with a fork. Crumbs of dough will start to form.
Add an additional 1 or 2 Tbsp of chilled water.
Bring the dough together gently with your hands, and attempt to form a disk. If a dough will not form, mix in 1 or 2 Tbsp of water and try again. Continue to do this until a dough does form. The final dough will be a little bit sticky before it all holds together.
Complete the disk and wrap in waxed paper. Refrigerate 30 minutes.
After the dough has chilled, gently roll it out on a floured board until it is large enough to fit into an 11″ tart pan. The dough will be soft. Refrigerate 15 minutes.
Take the dough out of the refrigerator. It should have firmed up a bit. Prick with a fork. Line the tart shell with aluminum foil and then fill with pie weights (dried beans make good pie weights if you want to use something from around the house).
Bake the pie crust at 350° for 8–10 minutes.
Out of the oven, remove foil and weights, and cook an additional 8–10 minutes. When done, the edges of the tart will start to pull away from the tart pan.
Let the crust cool completely on a pie rack in the tart pan while preparing the filling.
Make the chocolate ganache filling and assemble the tart:
Ingredients:
1 cup whippng cream (cold)
10 oz. bittersweet chocolate (70% cocoa)
1/2 cup chocolate hazelnut spread*
1/4 tsp salt
1/2 tsp vanilla
1 cup hazelnuts, chopped**
*Nutella brand works well because it contains sugar. If using another brand, taste the mixture and add sugar as needed.
**If you buy whole hazelnuts, prepare as follows: roast whole nuts about 8–10 minutes at 350°, put into a small brown paper bag, and rub to remove as much of the brown “skin” as possible. Chop coarsely with a knife or a nut chopper/grinder device if you have one.
Method to make the filling:
Heat the whipping cream in a small saucepan until it just reaches a boil, and immediately pour over the finely chopped chocolate. (Use a heat-proof glass or CorningWare bowl for this step.)
Mix with a whisk until the chocolate has melted.
Add hazelnut spread, salt, and vanilla, and whisk again.
Whisk in the chopped hazelnuts. Keep mixing. The filling will start to thicken more and more as it cools.
Pour immediately into the cooled pie crust.
Refrigerate until the filling sets.
Take out of the refrigerator 30 minutes or so before serving to let the filling and crust soften a bit at room temperature.
Serve individual slices garnished with whipped cream and raspberries if desired.
Homemade whipped cream:
Ingredients:
(1 cup of whipping cream will serve about 4 people)
1 cup whipping cream (chilled)
1 Tbsp confectioner’s sugar
1 tsp vanilla
Method to make fresh whipped cream:
It is a snap to make whipped cream if all bowls/whisks/beaters and the cream is cold to start. In fact, be careful, because it is easy to overbeat and then you will end up with butter!
This whipped cream has a very light, not-too-sweet taste. More sugar and vanilla can be added as desired, or even a splash of liquor.
Chill a large bowl and the beaters in the freezer before starting.
Take the whipping cream directly from the refrigerator and pour 2 cups into your chilled bowl.
Add the confectioner’s sugar and vanilla and mix together with a fork to dissolve.
Hand mix very briskly with a whisk, or set your electric or standing mixer to medium and begin to whip the cream/sugar mixture.
Gradually increase the speed of your mixer as you continue beating the whipping cream.
Stop every couple of minutes to test the whipped cream. Near the end, as the whipping cream thickens, slow the mixer down and watch carefully.
When almost done, it will start to form a pattern of “ridges” in the bowl as you move your electric hand mixer back and forth. Lift up your beaters at this point. The whipped cream will cling to the beaters and make a soft peak that stands up when done.
—Kathryn Occhipinti

Privacy notice: Companies affiliated with this site may use cookies. If you want to learn how to disable or block cookies, see this link: https://www.google.com/search?q=How+to+block+cookies&oq=How+to+block+cookies&aqs=chrome..69i57.2864j0j7&sourceid=chrome&ie=UTF-8
 Kathryn Occhipinti, MD, is the author of the
Conversational Italian for Travelers series of books and a teacher of Italian for travelers to Italy in the Peoria and Chicago area.
“Everything you need to know to enjoy your visit to Italy!”
Join my Conversational Italian! Facebook group and follow me on Twitter at StellaLucente@travelitalian1 and start to learn Italian today for FREE!
Conversational Italian! Facebook Group
Tweet @travelitalian1 for Stella Lucente Italian
YouTube videos to learn Italian are available from © Stella Lucente, LLC.
Learn Conversational Italian.
More information on and photographs of Italy can be found on Facebook Stella Lucente Italian and Pinterest Stella Lucente Italian.
Facebook Stella Lucente Italian
Pinterest Stella Lucente Italian
Visit learntravelitalian.com/download.html to purchase/download Conversational Italian for Travelers and find more interesting facts and helpful hints about getting around Italy! Learn how to buy train tickets online, how to make international and local telephone calls, and how to decipher Italian coffee names and restaurant menus, all while gaining the basic understanding of Italian that you will need to know to communicate easily and effectively while in Italy. —From the staff at Stella Lucente, LLC
Italian Chocolate Hazelnut Tart