Tag Archives: Italian Food

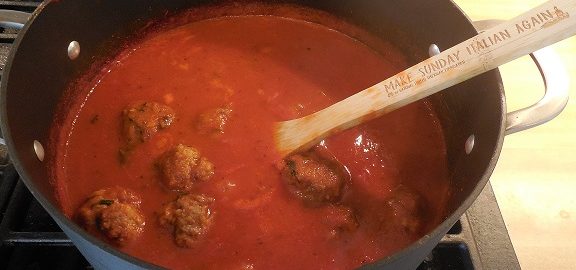
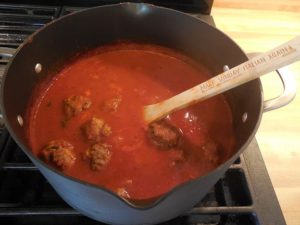
A pot of meatballs cooking in tomato sauce on the stove. The NIAF wooden spoon with the slogan "Make Sunday Italian Again" is in the pot

Italian Meatballs: A Tribute to our Italian Mothers

Italian Meatballs: A Tribute to our Italian Mothers

Best Kathy Twitter Pic edited for blog Italian Meatballs A Tribute to our Italian Mothers

Everyone’s Italian-American mom makes her own version of Italian Meatballs. And they are all the best!

Try Mom’s Best Italian Meatballs for YOUR Sunday Family Dinner! 

Italian Meatballs: A tribute to our Italian Mothers is a reprint from a blog originally posted on October 10, 2018, titled: “Mom’s Best Italian Meatballs.”

I’ve since learned a about vegetarian meatballs from the blog post “Polpette di Melanzana (Eggplant Balls)” by Luca Marchiori, who mentions in his blog that it is traditional to make meatballs from eggplant in Puglia. He also notes that in Italy, “meat is only one of many ingredients Italians use to make polpette. In Rome, for example, there is a restaurant called Polpetta which serves them made from a variety of ingredients, many of them vegetarian. In fact their menu is topped by the hashtag #tuttoèpolpettabile (#youcanmakepolpettefromanything).”  

Also…

I’ve since added Instagram to my social media, and have added a video from Instagram to this post so you can see me cooking in real-time!  I hope you like it!

For more recipes like these, as well as French recipes, follow me on my Instagram posts at Conversationalitalian.french.


And now… the original story!

The blog title, “Mom’s Best Italian Meatballs,” came about during an event I attended with the Chicagoland Italian American Professionals (CIAP) this fall.  The executive director, Salvatore Sciacca and his group feature Italian-American “cooking competition” events several times a year, and I have to say, they are always a delicious and  entertaining way to spend a Sunday afternoon with my family.

So, when I was invited to be one of the home cooks for this fall’s event,  The First Annual Meatball Fest,  I quickly checked my calendar, noted I was available, and signed up for another Sunday afternoon of Italian-American food and fun.

Making Mom’s Best Italian Meatballs

I had learned  my family recipe for Italian meatballs from my Sicilian-American mother and grandmother long ago, and have been preparing meatballs  for my own family for Italian Sunday dinners for about 20 years now.  I was happy to share my family’s recipe with other families at the event, and also looking forward to tasting what the other home cooks had to offer.

Growing up in an Italian-American household as I did, I really did not have to  do anything special to prepare for the  Italian meatball event held by the CIAP group – at least,
I thought I didn’t have to do anything special !

As it turned out, though, after hearing the other home cooks talk about their method for making meatballs,  I came home curious about the origins of this very common Italian-American dish and ended up doing a bit of research after the event!

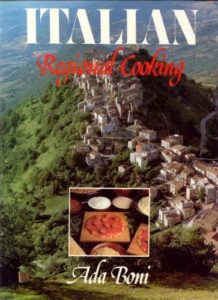
I decided to write a blog  to share my experiences that day and what I have been able to learn about  the evolution of the many different styles of meatballs that are loved here in America today.  And of, course, my family’s Italian-American recipe and tips I found from one of my favorite “go-to” Italian cook  books, Ada Boni’s  Italian Regional Cooking (translated from Italian into English by the International Culinary Society, New York ©1969will be included in the blog.

I’d love to hear how YOUR family makes Italian meatballs – leave a comment if you wish at the end of the blog! Buon appetito! – Kathryn Occhipinti


****************************************

How to Make “Mom’s Best Italian Meatballs”

****************************************

Let’s get back to the story of the day I was a home cook for  The First Annual Meatball Fest,  held by CIAP.

The morning of the CIAP event, I rummaged around the  basement to find my trusty crock pot, rinsed it off, and set a pot of tomato sauce to cook on the stove.  I set a large bowl on the counter and followed the same routine as I have done many times before for my family: put  ground beef  and all other ingredients into the large bowl, mix gently, and  roll into balls.
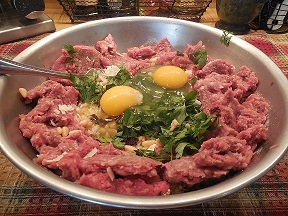
Meatball ingredients ready to mix
Italian meatball ingredients ready to mix
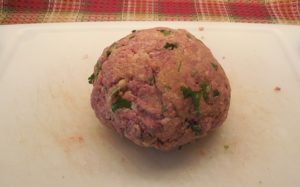
Italian meatball ready to fry
One Italian meatball ready to fry!


I am from the  “Italian Mom’s Cooking School” that fries, rather than bakes meatballs to brown them. ( Sorry, I hope I haven’t offended anyone – I know there is a BIG debate about this in the Italian-American community, but I think browning dries out the meatballs and is better left to restaurants making large batches of meatballs at one time.)

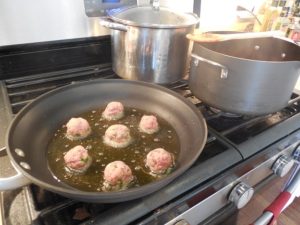
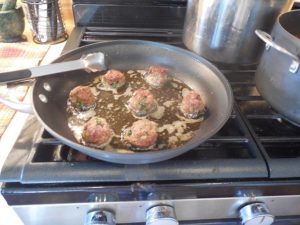
I browned my meatballs in olive oil carefully, turning each with tongs to get them browned on all sides.


Fry Italian meatballs in olive oil
Italian meatballs frying in olive oil
Italian meatballs turned in olive oil
Turn Italian meatballs gently to brown all sides evenly.


After the meatballs had browned, I added them gently to the simmering pot of tomato sauce on the stove to finish cooking.

I was taught to always stir my tomato sauce with a wooden spoon, and have a small collection of wooden spoons – some with long  handles, some with short handles;  some I save just for sauteing onions and garlic, others for “non-onion” savory or sweet dishes – but recently have been using my favorite  wooden spoon for my tomato sauce, which I bought as a part of a fundraiser for the National Italian American Foundation.

The NIAF recently started a “Make Sunday Italian Again” campaign, which I love, as it not only promotes Sunday time together with family, but also  raises money for their scholarship program by selling these “Nonna spoons” that have the slogan “Make Sunday Italian Again” engraved on the wooden handle.  Check out the NIAF website, if you like, after you finish reading this blog, of course!

Tomato sauce with Italian Meatballs
Italian meatballs cooking in tomato sauce


After about 30 minutes,  the meatballs had finished cooking and the sauce had a nice, meaty taste.  I adjusted the salt and pepper, put all into the crock pot and left to join the event.

When I arrived at the event, with my tried and true  “Mom’s Best Italian Meatballs”, I learned that I was one of 10 different contributors to the dinner!  I named my meatballs “Mom’s Best”,  because it seems to me that every Italian mother’s meatballs are loved and considered the best by her family!

CIAP 1st Annual Meatball Fest September 2018 attended by author Kathryn Occhipinti
Author/Blogger Kathryn Occhipinti at the CIAP 1st Annual Meatball Fest, September 2018

I was happy to see Italian-American home cooks of all ages, and both men and women contributed their meatballs for the event. There were two long tables of meatballs and a long line formed as everyone tried to taste them all.

CIAP 1st Annual Meatball FestEnjoying Italian meatballs at the CIAP 1st Annual Meatball Fest

At first, I had thought this would be a competition, but as it turned out, just as I had suspected, although all the meatballs were made with different ingredients, EVERYONE’s meatballs were delicious, and in the end, no vote was taken!

CIAP Mom's Best Italian Meatballs
Italian Meatballs to sample
CIAP Meatball Fest
More Italian Meatballs


Even more Italian meatballs
Even more Italian meatballs!


Below is a picture of those who participated, holding signs with the names of the type of meatballs they contributed. (I am in the back row and the Executive Director, Salvatore Sciacca, is just to my left.)

CIAP Italian meatball home cooks
Italian home cooks holding signs of the names of their meatballs at CIAP’s 1st Italian Meatball Fest

Read on for the recipe that I used to make my “Mom’s Best Italian Meatballs”.  Additional tips I learned from reading about meatballs are given in green italic lettering.  As a bonus, I am including my family’s recipe for basic Italian tomato sauce.  For tips on making Italian tomato sauce, please visit my blog Braciole – Italian Beef Rolls for Sunday Dinner.   Of course,  your own favorite tomato sauce will be fine as well!

But don’t stop after reading the first recipe, because when I went home I did a bit of research in Ada Boni’s cook book and discovered more tips on making “the best” meatballs in different styles that you may want to try yourself!


Mom’s Best Italian Meatballs 

Ingredients

1 medium onion, chopped finely
1 clove garlic, chopped
2 Tablespoons olive oil +more for frying
1 lb. ground beef (80% lean best)
1 egg
3/4 cup Progresso brand Italian bread crumbs
1/4 cup freshly grated Parmesan cheese
1/4 cup fresh parsley, chopped finely
Salt and Pepper to taste.

This recipe will serve 4 people; it can easily be doubled or tripled for a crowd!

Coat a small frying pan lightly with some olive oil  and add the chopped onion and garlic and a pinch of salt. Saute gently, stirring with a wooden spoon, until the onions and garlic have softened and given their flavor to the olive oil.

(I find that sauteing the onions and garlic gives both a nice mellow taste, and I would recommend not skipping this step.  In fact, when my  daughter was young, she insisted that she didn’t like onions,  so I would remove the onions after competing this step and she never caught on to my trick!)

Put the sauteed onions and garlic, with the olive oil, into a large bowl.

Add the rest of the ingredients: 2 additional tablespoons of olive oil,  ground beef, egg, breadcrumbs and parsley.

Sprinkle with salt and a grind of fresh pepper  to taste (some people like more pepper, others less).

Mix gently with your hands, careful not to work the meat too much or this may make the meatballs tough!

Adjust amount of breadcrumbs as needed – more if you more, less to make a more  “meaty” meatball.  If too dry, add a few drops more of olive oil.

(What I learned from researching meatballs – moisten the breadcrumbs in a bit of milk to make for a more tender meatball. The milk should be heated gently on the stove before adding the bread.  When all milk is absorbed, mash into a pulp with a fork.)

When the meatball mixture consistency is to your liking, pull a bit of the meat mixture off and roll into a ball to make a meatball.  Size of the meatballs is to taste, but of course the larger meatballs will need to finish cooking longer in the tomato sauce.

Set a frying pan coated with olive oil over medium-high heat.

Place the newly rolled meatballs gently into the frying pan. Fry on medium high heat (adjusting as necessary during the frying time), turning each with tongs so all sides become browned.

(What I learned from researching meatballs – roll each in a bit of flour or plain bread crumbs to aid browning and help the meatballs hold together during frying.)

After the meatballs have browned, immediately remove them with tongs and gently place into a pot of simmering tomato sauce (recipe below) to finish cooking.

Serve with spaghetti for the Italian-American presentation, or continue on to the following Italian recipes for other serving ideas.

 ******************************


Southern Italian Tomato Sauce  

Ingredients

1 medium onion, chopped finely
1 clove garlic, chopped
2 Tablespoons olive oil
1 can (28 oz.) Contadina brand tomato puree or chopped tomatoes
1 can Contadina brand tomato paste
1/4 cup dried parsley or chopped fresh parsley leaves
1 Tablespoon dried basil or 2 Tablespoons torn fresh basil
1 Tablespoon of salt or to taste

Heat the olive oil in a large pot and saute the onions and garlic with a wooden spoon until softened.

Add the tomato puree, tomato paste, parsley, and basil to the same pot.

Add 2 cups of water.

Cover, bring the sauce to a boil, and then reduce heat to medium-low.

Simmer on medium-low heat with the lid partially covering the pot, stirring occasionally with a wooden spoon for at least 1 hour, so the sauce does not stick to the bottom of the pot and burn.

Cook for at least 1 hour; at least 1.5 hours if adding meat to the sauce. (Brown any meat in a separate skillet before adding it.)

Add additional water if the sauce becomes too thick, or cook for additional time with the lid of the pot off if the sauce becomes too thin.


****************************************

How to Make Italian Meatballs – My research…

****************************************

Ada Boni,  (1881 – 1973) the author of  one of my favorite Italian cook books, Italian Regional Cooking, was a well-loved Italian author and food writer.  According to the back flap of the edition of my book, Ada Boni is known throughout Italy as the author of the classic bestselling cook book, Il Talismano della Felicità.

Boni worked as a magazine editor in Italy.  This book is a collection of the series of food articles about regional Italian cooking that was originally written for the Italian monthly magazine “Arianna”.  The magazine articles cataloged in depth recipes for the entire range of food served in the 14 major regions of Italy, long before the importance of regional cooking was understood here in America.  Boni was and still is well-known for the authenticity and variety of her recipes.

The book  Italian Regional Cooking is beautifully illustrated, with a spectacular photo montage of each Italian region to be covered at the beginning of each chapter that provides a backdrop for Italian tables laden with dishes from appetizer to dessert that evoke a special family gathering.  (There are no images for each individual recipe, however).  Although I have an edition from 1969 translated into English, the book is still listed on Amazon today.  I found this book about 30 years ago in a book store in California and my cover is tattered by now!

Italian Regional Cooking by Ada Boni
The book cover from “Italian Regional Cooking” by Ada Boni

When I wanted to research Italian meatballs, I searched this cook book in particular for a couple of reasons.  First, I wanted to discover if the way Italian-Americans now make meatballs differs significantly from how an Italian in southern Italy makes meatballs.  Second, I wanted to see if I could figure out the origins of the meatballs I make today.


****************************************

The Ingredients in Sicilian Meatballs

****************************************

In answer to my first question – do we make meatballs differently over here than they do in Italy, I searched  the chapter in Italian Regional Cooking that lists the recipes for Sicily.  I was pretty certain when I started my search that my family’s recipe was authentic, as it has been handed down from my grandmother, who spent her first 22 years in Sicily, and as the oldest child had been helping her mother with the household cooking since she was a young girl.

It turns out that the ingredients in Ada Boni’s  Sicilian“Polpette di Maiale con Pitaggio” are almost identical to my family’s meatballs.  “Polpette”* is the Italian word for what we call “meatballs” in America, but the translation given is, “Pork Rissoles with Vegetables.”

**********

The meat used for the meatball recipe from Sicily is pork, rather than beef, which of course would be more easy to come by in Sicily.  If I have ground pork or ground turkey on hand, I occasionally will use this meat to “lighten up” the meatballs.  The CIAP cooks used a variety of different meats (see about Neapolitan meatballs below).  The meatballs were rolled in a bit of flour before frying, which is an idea I will use from now on.

Instead of breadcrumbs, the recommendation is to soften the “pith of a small roll” with milk and “squeeze it dry.”  Several of the home cooks at the CIAP event mentioned using this method instead of  bread crumbs, and I will have to try this on my next attempt at making meatballs.   And, of course,  the Progresso brand of breadcrumbs is an American invention, so here is how we changed the meatball over in America for sure!

Other than that, the ingredients listed  for Sicilian Polpette were about the same as the meatballs I had learned to make.  The onion my family puts into meatballs was left out, but  included were garlic, fresh parsley, grated Parmesan or Pecorino cheese, eggs, salt, pepper, and a bit of flour to coat the meatballs before frying. The flour is another good tip!  Most of the CIAP cooks included these ingredients.

How to serve Sicilian meatballs: Suggested  serving was with sauteed artichokes (with chokes removed), green peas and fava beans in the same oil used for frying the meatballs.

I have not seen meatballs served this way, but plan on trying this suggestion, which sounds good  since true Italian meatballs  (I am told, but am not quite convinced) should served with Italian bread, rather than pasta.


***************************************

The Ingredients in Neapolitan Meatballs

****************************************

When I searched the chapter in Italian Regional Cooking  that lists the recipes for Napes-Capagna, I discovered “Polpette di Carne”, translated into “Meatballs in Tomato Sauce Neapolitan Style.” 

**********

The meat used for the meatball recipe from the Naples region is beef, which is probably the most common meat used in America today, although the CIAP cooks used ground pork and a mixture of been and pork as well.  One cook even made vegetarian meatballs of her own invention using zucchini flowers (Salvatore’s mother) and I have to say, they were delicious. Again, the meatballs were rolled in a bit of flour before frying.

Breadcrumbs were used in the Neapolitan recipe, of course grated from stale Italian bread,  and first moistened with a little milk.  This seems like a good idea to me, and I am going to include this tip from now on when I make meatballs.

The remaining ingredients listed  for Neapolitan Polpette differed significantly from the meatballs we see most frequently in America today in that they called for yellow raisins, pine nuts, and a bit of lard.  Onions were again left out. The remaining ingredients of garlic, parsley, eggs, and Parmesan cheese were the same basic ingredients given in the Sicilian recipe.

I tried the Neapolitan style meatballs one night for dinner (you might notice some pine nuts in the  images of my mixing bowl from the first section of the blog!), warning my family that they would taste sweeter than our usual meatball.  I have to say the addition of milk and a bit of lard made them the most tender meatballs I have ever had!

But it seems like Americans have lost their taste for a “sweet” meatball, however, and it was a consensus at the CIAP dinner that “no one” here in America used raisins anymore.

How to serve Neapolitan meatballs: Suggested  serving was with tomato sauce, and a recipe for simple tomato sauce was provided, as noted in the title for the recipe.

****************************************

How to Make Italian Meatballs – My conclusions…

****************************************

It seems to me that there are as many ways to make and serve Italian meatballs as there are home cooks to make them! I do find it interesting, though, that here in America we have retained the idea of cooking meatballs in tomato sauce, whether the idea is from Sicily or Naples, and meatballs are paired with spaghetti is indeed an “American classic”.


**********

 * A final tidbit of interesting information:  when I looked up the word “polpette” in the dictionary, which means “meatballs,” I discovered that the Italian singular “polpetta” for  the singular meatball, has several negative connotations.  “Polpetta” can refer to “poisoned bait,” possibly because the reference is to little pieces of meat that are poisoned. “Polpetta” can also be used in a figurative sense, to mean that a person is a “dud” or a “drag.”  

Kathryn Occhipinti


Best Kathy Twitter Pic edited for blog

Kathryn Occhipinti, MD, is the author of the
Conversational Italian for Travelers
 series of books and a teacher of Italian for travelers to Italy in the Peoria and Chicago area.
“Everything you need to know to enjoy your visit to Italy!”

Join my Conversational Italian! Facebook group and follow me on Twitter at StellaLucente@travelitalian1  and start to learn Italian today for FREE!
Conversational Italian! Facebook Group
Tweet @travelitalian1 for Stella Lucente Italian

YouTube videos to learn Italian are available from © Stella Lucente, LLC.
Learn Conversational Italian.

More information on and photographs of Italy can be found on Facebook Stella Lucente Italian and Pinterest Stella Lucente Italian.
Facebook Stella Lucente Italian

Pinterest Stella Lucente Italian

Visit learntravelitalian.com/download.html to purchase/download Conversational Italian for Travelers and find more interesting facts and helpful hints about getting around Italy! Learn how to buy train tickets online, how to make international and local telephone calls, and how to decipher Italian coffee names and restaurant menus, all while gaining the basic understanding of Italian that you will need to know to communicate easily and effectively while in Italy. —From the staff at Stella Lucente, LLC

Italian Meatballs: A Tribute to our Italian Mothers

Pasta and zucchini

Zucchini with Pasta Made Two Ways

Zucchini with Pasta Made Two Ways

Best Kathy Twitter Pic edited for blog  Zucchini with Pasta  is a classic combination, either alone or paired with  fresh, vine-ripened tomatoes and basil for a summer vegetable treat!

Zucchini and My Italian-American Gardening Family 

Growing up as I did with two Italian-American parents means that  to me, summertime will always be the time for gardening—and enjoying the fresh vegetables and fruits of that garden!

As I’ve written in my last blog under Italian and Italian-American Recipes, both sides of my Italian family have established summer vegetable gardens here in America.  My grandfather was a master gardener, and used knowledge he brought over from Sicily to create his perfect garden in a very small patch of land in Brooklyn, New York.

Most of my grandfather’s yard was dedicated to all kinds of  vegetables and fruits, perfectly staked  in neat rows so that no space was lost on his small plot of land. There were all kinds of tomatoes, both large and small, and green and red peppers of all types.  Vines of zucchini, or in Italian, molte zucchine, were somehow trained to grow  between the rows of tomatoes and peppers.  My grandfather grew the “typical” dark green zucchini found in all American supermarkets today, harvested at about 5-6″ long.

Recently, though, I’ve learned of a squash called cucuzza, which is so popular in the south of Italy that the word cucuzza has replaced the word  zucchine when people talk about squash grown in the summertime.  Read below for some “fun facts” about this type of squash and Italian-American culture.

Zucchini and Italian Culture

Cucuzza – The Famous Italian Summer Squash

Image from www.specialtyproduce.com

A famous long, thin, light green squash that is harvested in the summer from southern Italy and Sicily is known as “cucuzza.”  Cucuzza (pronounced “goo-gooz” in  Sicilian dialect) typically grows from 1 to 3 feet. Unlike a true summer squash, the skin from this squash must be peeled before cooking.  There is a well-known Sicilian proverb that states, “Cucinala come vuoi, sempre cucuzza è!” meaning, “However you cook it, it’s still just squash!” 

Cucuzza is also used as an endearing term for a young girl in a 1950’s Italian novelty song sung by Louis Prima called, “My Cucuzza.”  He sings about the vegetable, Cucuza grows in Italy down on the farm.  It’s something like zucchini flavored with Italian charm… I call my girl cucuzza because she’s as sweet as can be.”  To hear the song sung by Louis Prima in it’s entirety, click this My Cucuzza link.


Zucchini with Pasta Made Two Ways

To continue with the story of my family, while my grandfather was busy gardening, my grandmother was busy in the kitchen!  She created wonderful dishes from zucchini, which was a favorite summer vegetable in my mother’s house and is in my house today.

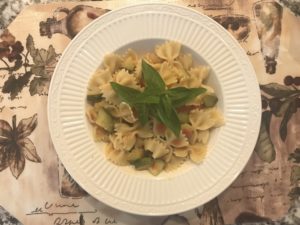
Pasta with zucchini and fresh tomatoes and basil is a classic Italian combination that my grandmother and mother made frequently. In this dish, chopped tomatoes are cooked in olive oil just to soften, and left chunky, which is different than the more usual pureed tomato sauce of winter in Southern Italian households. In the recipe below, I’ve used bow-tie pasta, which makes it fun for kids of all ages to eat their zucchini! Note that basil, not oregano,  is the herb of choice for any type of pasta and “fresh tomato sauce” combination.

My mother recently remembered my grandmother’s summer version of   “Spaghetti Aglio Olio,” or spaghetti with garlic in olive oil, which was modified in the summer to include zucchini slices fried gently in the garlic-flavored olive oil until a light golden color.  I made this simple recipe for my family’s dinner one recent summer evening, and topped with Parmesan cheese it quickly disappeared.

Yes, with the zucchini and pasta combination recipes that I share below, children of all ages will love to eat their vegetables! I hope your family enjoys this zucchini recipes as much as my family does!  -Kathryn Occhipinti


Zucchini with Pasta and  Fresh Tomatoes and Basil

Zucchini and Pasta
Zucchini with Bow Tie Pasta and Fresh Tomato-Basil Sauce

Ingredients
(Serves 1-4)

3 cloves of garlic, chopped coarsely
2 medium-size zucchini, chopped coarsely
4 plumb tomatoes, chopped coarsely
1 large bunch of fresh basil,
leaves stripped from stems and hand-torn
1 box (1 lb.) bow-tie pasta, cooked al-dente
1/2 cup coarsely grated Parmesan cheese
salt to taste


Method

Set a pot of water on the stove to boil for making the spaghetti.  When the water does boil, add salt, cover, bring to boil again, and then uncover and add bow-tie pasta. Stir pasta, cover and bring to a boil again. Take cover off and stir.  Let the pasta cook until al-dente (“to the tooth”), or slightly firm, stirring occasionally,  while you cook the zucchini below.

The rest of the dish is made in a large frying pan with high sides.

Add enough olive oil to almost cover the frying pan and then heat gently on medium-high heat.

Add chopped garlic and let soften.

Add chopped zucchini and a sprinkle of salt, and let soften, stirring frequently, so the zucchini does not burn, but browns lightly.

Add chopped tomatoes and freshly torn basil leaves, and stir.

Add a bit of the pasta water and turn the heat down to simmer.  Let the sauce cook for 10 – 15 minutes, until all vegetables have softened, but are still a bit firm, stirring frequently.

When the “sauce” is ready, drain the pasta and add to the frying pan.  Depending on the size of zucchinis and tomatoes you use, you may have a little less or more sauce than needed for 1 lb. of pasta.  Add “enough” pasta to the frying pan so when it is mixed it is coated lightly with the “sauce.”

Add the coarsely grated Parmesan cheese and mix again.  Salt to taste.

Serve with additional grated Parmesan cheese on the side and enjoy!

Check out my Instagram post if you’d like to see me actively making this zucchini and pasta dish.  A delicious dinner or side dish will be ready in no time with this classic Italian combination!


Zucchini with Spaghetti Aglio Olio
(Zucchini with Spaghetti in Garlic and Olive Oil)

Ingredients
(Serves 1-4)


3 cloves of garlic, crushed
2 to 4  medium sized zucchini, sliced into thin rounds
(cut the zucchini cross-wise from one end to the other,
as in photo of cucuzza above)
1 lb. of spaghetti
1/2 cup coarsely grated Parmesan cheese
salt to taste

Method

Set a pot of water on the stove to boil for making the spaghetti.  When the water does boil, add salt, cover, bring to boil again, and then uncover and add spaghetti. Stir spaghetti, cover and bring to a boil again. Take cover off and stir.  Let the spaghetti cook until al-dente (“to the tooth”), or slightly firm, stirring occasionally,  while you cook the zucchini below.

The rest of the dish is made in a large frying pan with high sides.

Add enough olive oil to almost cover the frying pan and then heat gently on medium-high heat.

Add the crushed garlic cloves and let soften to flavor the oil.

Add sliced zucchini, spreading over the pan in one layer, so the zucchini can fry in the oil evenly.  You will need to do this in 2 or more batches if cooking more zucchini slices than the size pan you have can accomodate.

After a about 5 minutes, when the zucchini rounds have softened, turn and let the other side soften.

Continue to cook until zucchini rounds have shrunk and turned a light, golden brown.

When the zucchini is ready, drain the spaghetti and put into a large serving bowl.

Add the fried zucchini from the pan,  without draining the olive oil from the zucchini rounds. Mix. Add additional olive oil from the pan as needed to coat the spaghetti lightly and evenly.

Add the coarsely grated Parmesan cheese and mix again.  Salt to taste.

Serve with additional grated Parmesan cheese on the side and enjoy!

Check out my Instagram site (soon to be posted) if you’d like to see me actively making zucchini and spaghetti aglio olio.  A delicious dinner or side dish will be ready in no time with this classic Italian combination!

— by Kathryn Occhipinti

Best Kathy Twitter Pic edited for blog

Kathryn Occhipinti, MD, is the author of the
Conversational Italian for Travelers
 series of books and a teacher of Italian for travelers to Italy in the Peoria and Chicago area.
“Everything you need to know to enjoy your visit to Italy!”

Join my Conversational Italian! Facebook group and follow me on Twitter at StellaLucente@travelitalian1  and start to learn Italian today for FREE!
Conversational Italian! Facebook Group
Tweet @travelitalian1 for Stella Lucente Italian

YouTube videos to learn Italian are available from © Stella Lucente, LLC.
Learn Conversational Italian.

More information on and photographs of Italy can be found on Facebook Stella Lucente Italian and Pinterest Stella Lucente Italian.
Facebook Stella Lucente Italian

Pinterest Stella Lucente Italian

Visit learntravelitalian.com/download.html to purchase/download Conversational Italian for Travelers and find more interesting facts and helpful hints about getting around Italy! Learn how to buy train tickets online, how to make international and local telephone calls, and how to decipher Italian coffee names and restaurant menus, all while gaining the basic understanding of Italian that you will need to know to communicate easily and effectively while in Italy. —From the staff at Stella Lucente, LLC

Zucchini with Pasta Two Ways

Tomato, Mozzarella, and fresh basil salad

Caprese and Panzanella Salads with Fresh Tomatoes and Basil

Caprese and Panzanella Salads with Fresh Tomatoes and Basil

Best Kathy Twitter Pic edited for blog  Caprese and Panzanella Salads  are what Italians make with their fresh, vine-ripened tomatoes and basil for a summer salad treat!

My Italian-American Gardening Family 

Growing up as I did with two Italian-American parents means that  to me, summertime will always be the time for gardening—and enjoying the fresh vegetables and fruits of that garden!

Both sides of my Italian family have established summer vegetable gardens here in America.  My grandfather was a master gardener, and used knowledge he brought over from Sicily to create his perfect garden in a very small patch of land in Brooklyn, New York.  As a small child, I knew that my fondest memories of summer would begin as I opened the large, decorative, black iron gate to enter what to me was a miraculous place – my grandparent’s a two story attached brick building that had my grandfather’s grape vines growing happily along the only free side.  Out back, there was a small cement landing where the family gathered amid large decorative clay pots of herbs, with a pergola for the ripened grapes to hang from and provide shade, of course!

The rest of my grandfather’s yard was dedicated to all kinds of  vegetables and fruits, perfectly staked  in neat rows so that no space was lost on his small plot of land.  I loved picking the  perfectly red, vine-ripened tomatoes, green peppers and fresh, soft  purple figs to take home. Yes, my grandfather even managed to keep fig trees alive during the cold NYC winters by bundling the branches up a pail and covering them with blankets, just so we could enjoy baskets of fresh figs for the summer. And enjoy them we did!

While my grandfather was busy gardening, my grandmother was busy in the kitchen!  She created wonderful tomato salads  for summertime with our fresh tomatoes and our favorite herb—basil, with its leaves freshly  pinched off  right from the stem of the plant. Even today, the women in my family keep a small pot or glass with water by the kitchen window with cuttings of fresh basil ready to make a cool tomato Caprese salad or a Panzanella salad for lunch.

Caprese and Panzanella Salads

Making Caprese and Panzanella salads entails following a couple of simple methods, using whatever you have on hand, rather than following a strict recipe step by step. However, it is best to come as close as possible to the recommended ingredients, as the ingredients themselves will be the stars of each dish.

For the most mouth-watering Caprese salad imaginable, use fresh, vine-ripened tomatoes and soft, fresh buffalo mozzarella.  In fact, do not make this salad if you do not have a soft, buffalo mozzarella, as this is the mozzarella that is used in the island of Capri, just outside Naples, where the salad originated. The hard mozzarella is for cooking, as it melts easily; it is too rubbery to be eaten with the soft, vine-ripened tomatoes and will not meld with the tomato juices and olive oil properly.

Coarse sea salt adds extra flavor to the tomatoes and will draw out their juices to meld with the olive oil for the dressing. Top all with a generous drizzle of your favorite pungent or fruity, extra-virgin olive oil from Italy, rather than the a more bland olive oil that you would use for cooking on the stove top.

A note about extra-virgin olive oils:  A truly fresh extra-virgin olive oil will have a bit of a peppery flavor.  Most olive oils sold in the US are old enough to have lost this peppery overtone, but will retain varying degrees of fruitiness and grassiness. Taste a few first press, 100% extra-virgin olive oils from different regions of Italy and you will be surprised at the nuances in flavor each brings!

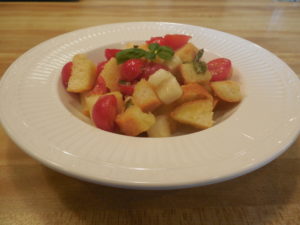
For Panzanella salad, which probably originated as a clever way to use up day-old, stale bread with red onion for flavor, be sure to use a crusty loaf of  good* Italian bread that is at least two days old and has dried out and hardened. Bread that has become stale naturally will need to be sprinkled with water to soften a bit prior to making this salad. Place the bread in a small bowl and sprinkle it with water the morning before you are planning to make the salad. The end result should not leave the bread mushy; the bread should spring back to life after the water is added if you are truly working with real Italian bread. If the crust is still too hard, it can be removed. Remember that the bread will continue to soften when it is combined with the vinegar and tomato juice when you make the salad.

If you want to make Panzanella salad with fresh Italian bread, you can always cut it into slices and dry it out in the oven just enough to be crunchy, or even add a bit of olive oil and brown it a bit to make croutons.

Panzanella salad originally did not contain mozzarella, but I like to include buffalo mozzerella in small pieces (bocconcini are nice), even though this is not traditional.

And, of course, large, sweet, fresh basil leaves from the garden are an essential ingredient for both Caprese and Panzanella salads!

But, whatever ingredients you have on hand, I’m sure you will enjoy these simple and refreshing tomato and basil salads on a hot summer day!  -Kathyn Occhipinti

*Good Italian bread means Italian bread made in a bakery with the correct flour and cooked so that it has the proper, crunchy crust and soft but chewy texture.  Only bread that has a good texture to begin with will “spring back” to life when you sprinkle it with water!  Do not attempt Panzanella salad with cheap, grocery store bread labeled “Italian bread,” which will usually have a very soft grain and often even a soft crust and turn to mush when moistened again with water. And of course, no American “white bread” please!


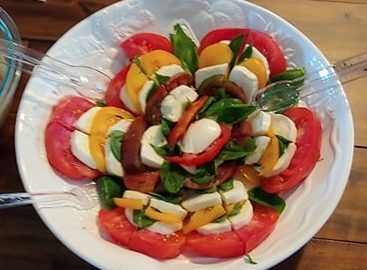
Caprese Salad


Tomato, basil and mozzarella caprese salad
Italian Caprese Salad, with layers of tomato, buffalo mozzarella and basil leaves ready to share

Ingredients
(Serves 1-4)

3 large, vine-ripened tomatoes,
(each a different color to add interest;
heirloom tomatoes if desired)
Sea salt

Fresh buffalo mozzarella, sliced
Large, whole, freshly picked basil leaves
Extra-virgin olive oil from Italy


Method

In an individual or large dish, create colorful layers of tomato slices (sprinkled with sea salt), mozzarella slices, and basil leaves.

If making in a large plate of Caprese salad for a crowd, have the tomato and mozzarella slices lengthwise once they are assembled and place a piece of mozzarella in the center to create a “flower” pattern, as in the picture above.  Decorate with extra basil.

Let sit for about 15 minutes for the tomato juices to develop. Drizzle with extra-virgin olive oil.

Serve with Italian bread to mop up the tomato juices and enjoy!

Check out my Instagram post if you’d like to see me actively making a Caprese salad that can be shared by two people.  Remember, the correct choice of  ingredients is the key to this simple “salad.  A touch of sea-salt to bring the juices out of the tomatoes that provide the acid for the “vinaigrette” and a drizzle of your favorite extra-virgin olive oil makes an exquisite summertime treat!


Panzanella Salad

Tomato and bread Panzanella salad
Italian Panzanella salad with halved cherry tomatoes, mozzarella, fresh torn basil and bread

Ingredients
(Serves 1-4)


Dry Italian bread, cubed, or large croutons
Sprinkle the dried Italian bread with water to soften
(see comments about the proper bread to use above)

1-2 large, vine-ripened tomato, cut into small wedges
or several cherry tomatoes, halved
sprinkle lightly with sea salt

1/2 red onion, sliced thinly into crescents

Extra-virgin Italian olive oil
Italian red wine vinegar

Mozzarella, preferably soft, cubed or small bocconcini (optional)
Large, freshly picked basil leaves, hand torn

Method


In a large dish, combine small wedges of fresh tomatoes or halved cherry tomatoes and dry Italian bread (as pre-processed as above) and red onions.

Drizzle on extra virgin Italian olive oil and red wine vinegar and combine.  Make sure the bread has softened enough to be edible. If not, you may want to let the ingredients sit for a bit before finishing the salad.

Then add the optional mozzarella and torn basil leaves.

Mix gently.

Taste and drizzle with extra olive oil and vinegar if needed.

Mix again gently to combine all and enjoy!

— by Kathryn Occhipinti

Best Kathy Twitter Pic edited for blog

Kathryn Occhipinti, MD, is the author of the
Conversational Italian for Travelers
 series of books and a teacher of Italian for travelers to Italy in the Peoria and Chicago area.
“Everything you need to know to enjoy your visit to Italy!”

Join my Conversational Italian! Facebook group and follow me on Twitter at StellaLucente@travelitalian1  and start to learn Italian today for FREE!
Conversational Italian! Facebook Group
Tweet @travelitalian1 for Stella Lucente Italian

YouTube videos to learn Italian are available from © Stella Lucente, LLC.
Learn Conversational Italian.

More information on and photographs of Italy can be found on Facebook Stella Lucente Italian and Pinterest Stella Lucente Italian.
Facebook Stella Lucente Italian

Pinterest Stella Lucente Italian

Visit learntravelitalian.com/download.html to purchase/download Conversational Italian for Travelers and find more interesting facts and helpful hints about getting around Italy! Learn how to buy train tickets online, how to make international and local telephone calls, and how to decipher Italian coffee names and restaurant menus, all while gaining the basic understanding of Italian that you will need to know to communicate easily and effectively while in Italy. —From the staff at Stella Lucente, LLC

Caprese and Panzanella Salads with Fresh Tomatoes and Basil

Pasta and Lentils

Italian Pasta and Lentils for New Year’s Good Luck

Italian Pasta and Lentils for New Year’s Good Luck

Best Kathy Twitter Pic edited for blog Italian pasta and lentils — is said to bring families around the world good luck for the new year !

Italian Pasta and Lentils for New Year’s Good Luck! 

Pasta with lentils or lentil soup is a New Year’s tradition in many Italian households. The  lentil dishes are said to bring to luck to the family on New Year’s Day.  I am not sure if anyone really knows exactly why lentils are supposed to be good luck.  Maybe it is because they are shaped like small coins?

Whatever the reason, pasta and lentils is a hearty and delicious winter combination. Lentils are rich in protein,  and the pasta/lentil combination was probably an important contribution to family nutrition  in the days of the “cucina povera” cooking in Italy. Flavored with a bit of pancetta (Italian peppery bacon), garlic and tomato, the lentils make a delicious sauce that coats the pasta beautifully.

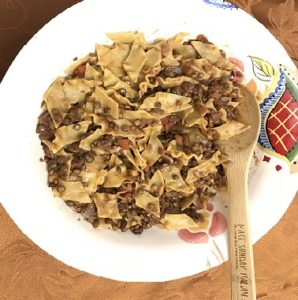
I used “maltagliati” or “poorly cut” pasta for this dish,  which to me is reminiscent of its “cucina povera,” origins but also because  the lentils cling nicely to the short, flat noodles. If you cannot find maltagliati pasta, lasagna noodles broken by hand into small, irregular pieces will give a similar effect.

Buon anno 2019 a tutti!  Try my pasta and lentils dish on a wintry day for a warm and comforting meal.   -Kathyn Occhipinti


Italian Pasta and Lentils


Italian Lentils and Pasta
Pasta and Lentils ready to serve for Italian New Year’s Sunday dinner

Ingredients
(Serves 4)


1/4 cup olive oil
1/4 cup pancetta (Italian bacon), diced finely
1  small carrot, chopped finely*
1 stalk of celery, chopped finely*
1 small onion, skin removed, chopped finely*
1 small clove garlic, chopped finely
1/2 cup dry Italian wine, such as Chianti
1 cup Italian lentils, rinsed
1 bay leaf
pinch of dried thyme or rosemary
3 cups of water
1/2 cup of chicken or vegetable broth
1/2 cup chopped tomatoes
1 Tbsp. tomato puree
1 lb. maltagliati pasta or lasagna noodles, coarsely broken into small pieces
1/2 cup grated Parmesan or Pecorino Romano cheese
*See below for note about how to chop soup vegetables.


Method

Before starting to make the lentil sauce, put a large pot of salted water to boil on a back burner.  Cover so it will come to a boil quickly and be ready when you need to cook the pasta.

 Use a large frying pan or Dutch oven to cook the lentils on the stove top.  Coat the bottom of the pan with olive oil, which will take about 1/4 cup or so.  Let the oil heat a bit over medium heat.

Add the chopped vegetables: carrots, celery, onions, and garlic, and saute in the garlic until they soften, about 5 minutes.

The pour in the red wine and then bring to a boil. Boil off about half of the wine.

Put the lentils to the pan.  If you want firmer lentils, you can saute them at this point.  Otherwise, add the water.  Stir. Bring back to the boil and then lower heat and simmer the lentils about 20 minutes.

When the lentils have softened a bit, remove the bay leaf. Then add the chopped tomatoes, tomato paste, and chicken or vegetable broth.  Add more water if needed. Bring up to a simmer again and cook 10 – 15 minutes more, or until lentils are of desired tenderness.

Meanwhile, put the pasta into the boiling water.  Stir. Cover the pot to return to the boil Remove cover, stir again and let pasta cook, stirring occasionally.  Cook for less time than the package directions, to a very firm al dente, as the pasta will finish cooking with the lentils.

When the pasta is ready, drain, reserving some of the pasta water.

Add the pasta to the lentils.  Add the pasta water if needed.  The sauce should be fairly thick and coat the pasta nicely as you mix.

Cook over medium low heat another 5 minutes or so, until all is heated through and pasta is al dente.

Add the grated cheese and mix again to coat.

Serve steaming hot with crusty bread. Serve additional cheese and black pepper on the side to be added as desired.

New Year’s toast: Buon Anno!  Buon Appetito!


*How to Chop Vegetables
Carrots: Cut lengthwise to half, and then lengthwise again to get quarters. Line them up side by side and then cut crosswise from the tips to the base of the carrot to get small, even pieces that look like quarters of a circle.
Celery: Cut lengthwise through each celery stalk as many times as needed to give pieces the same thickness as the carrot pieces. (You will need more lengthwise cuts at the thicker part of the celery near the base.) Then cut crosswise from the tip to the base to get small, rectangular  pieces of celery about the same size as the carrot pieces.
 Onions: Cut lengthwise through the onion. Turn one of the halves flat side down.  Holding the onion together with one hand, cut lengthwise along the green lines through the onion, except for the root holding the onion together at the base.  Turn and cut horizontally, from the side away from the stem toward the stem.  Just before reaching the stem, flip the onion flat again and make the final cuts.  Discard the piece that contains the stem.

— by Kathryn Occhipinti

Best Kathy Twitter Pic edited for blogKathryn Occhipinti, MD, is the author of the
Conversational Italian for Travelers
 series of books and a teacher of Italian for travelers to Italy in the Peoria and Chicago area.
“Everything you need to know to enjoy your visit to Italy!”

Join my Conversational Italian! Facebook group and follow me on Twitter at StellaLucente@travelitalian1  and start to learn Italian today for FREE!
Conversational Italian! Facebook Group
Tweet @travelitalian1 for Stella Lucente Italian

YouTube videos to learn Italian are available from © Stella Lucente, LLC.
Learn Conversational Italian.

More information on and photographs of Italy can be found on Facebook Stella Lucente Italian and Pinterest Stella Lucente Italian.
Facebook Stella Lucente Italian

Pinterest Stella Lucente Italian

Visit learntravelitalian.com/download.html to purchase/download Conversational Italian for Travelers and find more interesting facts and helpful hints about getting around Italy! Learn how to buy train tickets online, how to make international and local telephone calls, and how to decipher Italian coffee names and restaurant menus, all while gaining the basic understanding of Italian that you will need to know to communicate easily and effectively while in Italy. —From the staff at Stella Lucente, LLC

Italian Pasta and Lentils for New Year’s Good Luck

Blogger Kathryn Occhipinti at the CIAP Meatball Fest

Mom’s Best Italian Meatballs

Mom’s Best Italian Meatballs

Best Kathy Twitter Pic edited for blog Italian Meatballs 

Everyone’s Italian-American mom makes her own version of Italian Meatballs. And they are all the best!

Try Mom’s Best Italian Meatballs for YOUR Sunday Family Dinner! 

The blog title, “Mom’s Best Italian Meatballs,” came about during an event I attended with the Chicagoland Italian American Professionals (CIAP) this fall.  The executive director, Salvatore Sciacca and his group, feature Italian-American “cooking competition” events several times a year, and I have to say, they are always a delicious and  entertaining way to spend a Sunday afternoon with my family.

So, when I was invited to be one of the home cooks for this fall’s event,  The First Annual Meatball Fest,  I quickly checked my calendar, noted I was available, and signed up for another Sunday afternoon of Italian-American food and fun.

Making Mom’s Best Italian Meatballs

I had learned  my family recipe for Italian meatballs from my Sicilian-American mother and grandmother long ago, and have been preparing meatballs  for my own family for Italian Sunday dinners for about 20 years now.  I was happy to share my family’s recipe with other families at the event, and also looking forward to tasting what the other home cooks had to offer.

Growing up in an Italian-American household as I did, I really did not have to  do anything special to prepare for the  Italian meatball event held by the CIAP group – at least,
I thought I didn’t have to do anything special !

As it turned out, though, after hearing the other home cooks talk about their method for making meatballs,  I came home curious about the origins of this very common Italian-American dish and ended up doing a bit of research after the event!

I decided to write a blog  to share my experiences that day and what I have been able to learn about  the evolution of the many different styles of meatballs that are loved here in America today.  And of, course, my family’s Italian-American recipe and tips I found from one of my favorite “go-to” Italian cook  books, Ada Boni’s  Italian Regional Cooking (translated from Italian into English by the International Culinary Society, New York ©1969will be included in the blog.

I’d love to hear how YOUR family makes Italian meatballs – leave a comment if you wish at the end of the blog! Buon appetito! – Kathryn Occhipinti


****************************************

How to Make “Mom’s Best Italian Meatballs”

****************************************

Let’s get back to the story of the day I was a home cook for  The First Annual Meatball Fest,  held by CIAP.

The morning of the CIAP event, I rummaged around the  basement to find my trusty crock pot, rinsed it off, and set a pot of tomato sauce to cook on the stove.  I set a large bowl on the counter and followed the same routine as I have done many times before for my family: put  ground beef  and all other ingredients into the large bowl, mix gently, and  roll into balls.
Meatball ingredients ready to mix
Italian meatball ingredients ready to mix
Italian meatball ready to fry
One Italian meatball ready to fry!


I am from the  “Italian Mom’s Cooking School” that fries, rather than bakes meatballs to brown them. ( Sorry, I hope I haven’t offended anyone – I know there is a BIG debate about this in the Italian-American community, but I think browning dries out the meatballs and is better left to restaurants making large batches of meatballs at one time.)

I browned my meatballs in olive oil carefully, turning each with tongs to get them browned on all sides.
 

Fry Italian meatballs in olive oil
Italian meatballs frying in olive oil
Italian meatballs turned in olive oil
Turn Italian meatballs gently to brown all sides evenly.


After the meatballs had browned, I added them gently to the simmering pot of tomato sauce on the stove to finish cooking.

I was taught to always stir my tomato sauce with a wooden spoon, and have a small collection of wooden spoons – some with long  handles, some with short handles;  some I save just for sauteing onions and garlic, others for “non-onion” savory or sweet dishes – but recently have been using my favorite  wooden spoon for my tomato sauce, which I bought as a part of a fundraiser for the National Italian American Foundation.

The NIAF recently started a “Make Sunday Italian Again” campaign, which I love, as it not only promotes Sunday time together with family, but also  raises money for their scholarship program by selling these “Nonna spoons” that have the slogan “Make Sunday Italian Again” engraved on the wooden handle.  Check out the NIAF website, if you like, after you finish reading this blog, of course!
Tomato sauce with Italian Meatballs
Italian meatballs cooking in tomato sauce


After about 30 minutes,  the meatballs had finished cooking and the sauce had a nice, meaty taste.  I adjusted the salt and pepper, put all into the crock pot and left to join the event.

When I arrived at the event, with my tried and true  “Mom’s Best Italian Meatballs”, I learned that I was one of 10 different contributors to the dinner!  I named my meatballs “Mom’s Best”,  because it seems to me that every Italian mother’s meatballs are loved and considered the best by her family!

CIAP 1st Annual Meatball Fest September 2018 attended by author Kathryn Occhipinti
Author/Blogger Kathryn Occhipinti at the CIAP 1st Annual Meatball Fest, September 2018

I was happy to see Italian-American home cooks of all ages, and both men and women contributed their meatballs for the event. There were two long tables of meatballs and a long line formed as everyone tried to taste them all.

CIAP 1st Annual Meatball FestEnjoying Italian meatballs at the CIAP 1st Annual Meatball Fest

At first, I had thought this would be a competition, but as it turned out, just as I had suspected, although all the meatballs were made with different ingredients, EVERYONE’s meatballs were delicious, and in the end, no vote was taken!

CIAP Mom's Best Italian Meatballs
Italian Meatballs to sample
CIAP Meatball Fest
More Italian Meatballs


Even more Italian meatballs
Even more Italian meatballs!


Below is a picture of those who participated, holding signs with the names of the type of meatballs they contributed. (I am in the back row and the Executive Director, Salvatore Sciacca, is just to my left.)

CIAP Italian meatball home cooks
Italian home cooks holding signs of the names of their meatballs at CIAP’s 1st Italian Meatball Fest

Read on for the recipe that I used to make my “Mom’s Best Italian Meatballs”.  Additional tips I learned from reading about meatballs are given in green italic lettering.  As a bonus, I am including my family’s recipe for basic Italian tomato sauce.  For tips on making Italian tomato sauce, please visit my blog Braciole – Italian Beef Rolls for Sunday Dinner.   Of course,  your own favorite tomato sauce will be fine as well!

But don’t stop after reading the first recipe, because when I went home I did a bit of research in Ada Boni’s cook book and discovered more tips on making “the best” meatballs in different styles that you may want to try yourself!


Mom’s Best Italian Meatballs 

Ingredients

1 medium onion, chopped finely
1 clove garlic, chopped
2 Tablespoons olive oil +more for frying
1 lb. ground beef (80% lean best)
1 egg
3/4 cup Progresso brand Italian bread crumbs
1/4 cup freshly grated Parmesan cheese
1/4 cup fresh parsley, chopped finely
Salt and Pepper to taste.

This recipe will serve 4 people; it can easily be doubled or tripled for a crowd!

Coat a small frying pan lightly with some olive oil  and add the chopped onion and garlic and a pinch of salt. Saute gently, stirring with a wooden spoon, until the onions and garlic have softened and given their flavor to the olive oil.

(I find that sauteing the onions and garlic gives both a nice mellow taste, and I would recommend not skipping this step.  In fact, when my  daughter was young, she insisted that she didn’t like onions,  so I would remove the onions after competing this step and she never caught on to my trick!)

Put the sauteed onions and garlic, with the olive oil, into a large bowl.

Add the rest of the ingredients: 2 additional tablespoons of olive oil,  ground beef, egg, breadcrumbs and parsley.

Sprinkle with salt and a grind of fresh pepper  to taste (some people like more pepper, others less).

Mix gently with your hands, careful not to work the meat too much or this may make the meatballs tough!

Adjust amount of breadcrumbs as needed – more if you more, less to make a more  “meaty” meatball.  If too dry, add a few drops more of olive oil.

(What I learned from researching meatballs – moisten the breadcrumbs in a bit of milk to make for a more tender meatball.)

When the meatball mixture consistency is to your liking, pull a bit of the meat mixture off and roll into a ball to make a meatball.  Size of the meatballs is to taste, but of course the larger meatballs will need to finish cooking longer in the tomato sauce.

Set a frying pan coated with olive oil over medium-high heat.

Place the newly rolled meatballs gently into the frying pan. Fry on medium high heat (adjusting as necessary during the frying time), turning each with tongs so all sides become browned.

(What I learned from researching meatballs – roll each in a bit of flour to aid browning if you want.)

After the meatballs have browned, immediately remove them with tongs and gently place into a pot of simmering tomato sauce (recipe below) to finish cooking.

Serve with spaghetti for the Italian-American presentation, or continue on to the following Italian recipes for other serving ideas.

 ******************************


Southern Italian Tomato Sauce  

Ingredients

1 medium onion, chopped finely
1 clove garlic, chopped
2 Tablespoons olive oil
1 can (28 oz.) Contadina brand tomato puree or chopped tomatoes
1 can Contadina brand tomato paste
1/4 cup dried parsley or chopped fresh parsley leaves
1 Tablespoon dried basil or 2 Tablespoons torn fresh basil
1 Tablespoon of salt or to taste

Heat the olive oil in a large pot and sauté the onions and garlic with a wooden spoon until softened.

Add the tomato puree, tomato paste, parsley, and basil to the same pot.

Add 2 cups of water.

Cover, bring the sauce to a boil, and then reduce heat to medium-low.

Simmer on medium-low heat with the lid partially covering the pot, stirring occasionally with a wooden spoon for at least 1 hour, so the sauce does not stick to the bottom of the pot and burn.

Cook for at least 1 hour; at least 1.5 hours if adding meat to the sauce. (Brown any meat in a separate skillet before adding it.)

Add additional water if the sauce becomes too thick, or cook for additional time with the lid of the pot off if the sauce becomes too thin.


****************************************

How to Make Italian Meatballs – My research…

****************************************

Ada Boni,  (1881 – 1973) the author of  one of my favorite Italian cook books, Italian Regional Cooking, was a well-loved Italian author and food writer.  According to the back flap of the edition of my book, Ada Boni is known throughout Italy as the author of the classic bestselling cook book, Il Talismano della Felicità.

Boni worked as a magazine editor in Italy.  This book is a collection of the series of food articles about regional Italian cooking that was originally written for the Italian monthly magazine “Arianna”.  The magazine articles cataloged in depth recipes for the entire range of food served in the 14 major regions of Italy, long before the importance of regional cooking was understood here in America.  Boni was and still is well-known for the authenticity and variety of her recipes.

The book  Italian Regional Cooking is beautifully illustrated, with a spectacular photo montage of each Italian region to be covered at the beginning of each chapter that provides a backdrop for Italian tables laden with dishes from appetizer to dessert that evoke a special family gathering.  (There are no images for each individual recipe, however).  Although I have an edition from 1969 translated into English, the book is still listed on Amazon today.  I found this book about 30 years ago in a book store in California and my cover is tattered by now!
Italian Regional Cooking by Ada Boni
The book cover from “Italian Regional Cooking” by Ada Boni

When I wanted to research Italian meatballs, I searched this cook book in particular for a couple of reasons.  First, I wanted to discover if the way Italian-Americans now make meatballs differs significantly from how an Italian in southern Italy makes meatballs.  Second, I wanted to see if I could figure out the origins of the meatballs I make today.


****************************************

The Ingredients in Sicilian Meatballs

****************************************

In answer to my first question – do we make meatballs differently over here than they do in Italy, I searched  the chapter in Italian Regional Cooking that lists the recipes for Sicily.  I was pretty certain when I started my search that my family’s recipe was authentic, as it has been handed down from my grandmother, who spent her first 22 years in Sicily, and as the oldest child had been helping her mother with the household cooking since she was a young girl.

It turns out that the ingredients in Ada Boni’s  Sicilian“Polpette di Maiale con Pitaggio” are almost identical to my family’s meatballs.  “Polpette”* is the Italian word for what we call “meatballs” in America, but the translation given is, “Pork Rissoles with Vegetables”.

**********

The meat used for the meatball recipe from Sicily is pork, rather than beef, which of course would be more easy to come by in Sicily.  If I have ground pork or ground turkey on hand, I occasionally will use this meat to “lighten up” the meatballs.  The CIAP cooks used a variety of different meats (see about Neapolitan meatballs below).  The meatballs were rolled in a bit of flour before frying, which is an idea I will use from now on.

Instead of breadcrumbs, the recommendation is to soften the “pith of a small roll” with milk and “squeeze it dry.”  Several of the home cooks at the CIAP event mentioned using this method instead of  bread crumbs, and I will have to try this on my next attempt at making meatballs.   And, of course, Progresso brand is an American invention, so here is how we changed the meatball over in America for sure!

Other than that, the ingredients listed  for Sicilian Polpette were about the same as the meatballs I had learned to make.   The onion my family puts into meatballs was left out, but  included were garlic, fresh parsley, grated Parmesan or Pecorino cheese, eggs, salt, pepper, and a bit of flour to coat the meatballs before frying. The flour is another good tip!  Most of the CIAP cooks included these ingredients.

How to serve Sicilian meatballs: Suggested  serving was with sauteed artichokes (with chokes removed), green peas and fava beans in the same oil used for frying the meatballs.

I have not seen meatballs served this way, but plan on trying this suggestion, which sounds good  since true Italian meatballs  (I am told, but am not quite convinced) should served with Italian bread, rather than pasta.


***************************************

The Ingredients in Neapolitan Meatballs

****************************************

When I searched the chapter in Italian Regional Cooking  that lists the recipes for Napes-Capagna, I discovered “Polpette di Carne”, translated into “Meatballs in Tomato Sauce Neapolitan Style.” 

**********

The meat used for the meatball recipe from the Naples region is beef, which is probably the most common meat used in America today, although the CIAP cooks used ground pork and a mixture of been and pork as well.  One cook even made vegetarian meatballs of her own invention using zucchini flowers (Salvatore’s mother) and I have to say, they were delicious. Again, the meatballs were rolled in a bit of flour before frying.

Breadcrumbs were used in the Neapolitan recipe, of course grated from stale Italian bread,  and first moistened with a little milk.  This seems like a good idea to me, and I am going to include this tip from now on when I make meatballs.

The remaining ingredients listed  for Neapolitan Polpette differed significantly from the meatballs we see most frequently in America today in that they called for yellow raisins, pine nuts, and a bit of lard.  Onions were again left out. The remaining ingredients of garlic, parsley, eggs, and Parmesan cheese were the same basic ingredients given in the Sicilian recipe.

I tried the Neapolitan style meatballs one night for dinner (you might notice some pine nuts in the  images of my mixing bowl from the first section of the blog!), warning my family that they would taste sweeter than our usual meatball.  I have to say the addition of milk and a bit of lard made them the most tender meatballs I have ever had!

But it seems like Americans have lost their taste for a “sweet” meatball, however, and it was a consensus at the CIAP dinner that “no one” here in America used raisins anymore.

How to serve Neapolitan meatballs: Suggested  serving was with tomato sauce, and a recipe for simple tomato sauce was provided, as noted in the title for the recipe.

****************************************

How to Make Italian Meatballs – My conclusions…

****************************************

It seems to me that there are as many ways to make and serve Italian meatballs as there are home cooks to make them! I do find it interesting, though, that here in America we have retained the idea of cooking meatballs in tomato sauce, whether the idea is from Sicily or Naples, and meatballs are paired with spaghetti is indeed an “American classic”.


**********

 * A final tidbit of interesting information:  when I looked up the word “polpette” in the dictionary, which means “meatballs,” I discovered that the Italian singular “polpetta” for  the singular meatball, has several negative connotations.  “Polpetta” can refer to “poisoned bait,” possibly because the reference is to little pieces of meat that are poisoned. “Polpetta” can also be used in a figurative sense, to mean that a person is a “dud” or a “drag.”  

Kathryn Occhipinti


Best Kathy Twitter Pic edited for blog

Kathryn Occhipinti, MD, is the author of the
Conversational Italian for Travelers
 series of books and a teacher of Italian for travelers to Italy in the Peoria and Chicago area.
“Everything you need to know to enjoy your visit to Italy!”

Join my Conversational Italian! Facebook group and follow me on Twitter at StellaLucente@travelitalian1  and start to learn Italian today for FREE!
Conversational Italian! Facebook Group
Tweet @travelitalian1 for Stella Lucente Italian

YouTube videos to learn Italian are available from © Stella Lucente, LLC.
Learn Conversational Italian.

More information on and photographs of Italy can be found on Facebook Stella Lucente Italian and Pinterest Stella Lucente Italian.
Facebook Stella Lucente Italian

Pinterest Stella Lucente Italian

Visit learntravelitalian.com/download.html to purchase/download Conversational Italian for Travelers and find more interesting facts and helpful hints about getting around Italy! Learn how to buy train tickets online, how to make international and local telephone calls, and how to decipher Italian coffee names and restaurant menus, all while gaining the basic understanding of Italian that you will need to know to communicate easily and effectively while in Italy. —From the staff at Stella Lucente, LLC

Mom’s Best Italian Meatballs

Italian Chocolate Hazelnut Tart

Italian Chocolate  Hazelnut Tart


Best Kathy Twitter Pic edited for blogItalian chocolate hazelnut tart: It’s  delicious for dessert!

Italian Chocolate Hazelnut Tart

This Italian chocolate hazelnut tart (crostata) blends two classic Italian ingredients that go perfectly with one another to create a delicious, sweet end to any meal. I think you will agree that a slice of this chocolate tart for dessert will add something special to any get-together or celebration.  And it is very simple to make!

A basic, pre-baked pie crust and a no-bake filling of chocolate ganache, hazelnut spread, and real hazelnuts will turn into something special when combined. The filling is candy-like, similar to the flavored chocolate fillings found in truffle candies, so even a thin slice is very rich! Also included is an easy method for homemade whipped cream.

Try a slice of our chocolate hazelnut tart topped with a dollop of freshly made whipped cream and see for yourself!
—Kathryn Occhipinti


Italian Chocolate Hazelnut Tart

Chocolate Hazelnut Crostata
A slice of Italian chocolate hazelnut tart topped with whipped cream and a raspberry. Serve with coffee and enjoy!


Make the tart pastry:
Chocolate Pasta Frolla
Ingredients:

1 1/2 cups all-purpose flour
¼ cup unsweetened cocoa powder (Dutch processed)
1/3 cup sugar
¼ tsp salt
1 stick (8 Tbsps) cold, unsalted butter, sliced into 1 Tb pieces
1 egg + 1 egg yolk, lightly mixed together
1 tsp vanilla
about 6–8 Tbsps of chilled water

Method to make the tart crust:

Sift together the flour, cocoa powder, sugar, and salt.

Cut in the butter with a pastry blender or a fork or rub between your thumb and the tips of your fingers to make small, flat, flakes of butter.

Mix the egg with the vanilla and then add to the dry ingredients. Add 5 Tbsp of chilled water. Mix all together with a fork. Crumbs of dough will start to form.

Add an additional 1 or 2 Tbsp of chilled water.

Bring the dough together gently with your hands, and attempt to form a disk. If a dough will not form, mix in 1 or  2 Tbsp of water and try again. Continue to do this until a dough does form. The final dough will be a little bit sticky before it all holds together.

Complete the disk and wrap in waxed paper. Refrigerate 30 minutes.

After the dough has chilled, gently roll it out on a floured board until it is large enough to fit into an 11″ tart pan. The dough will be soft. Refrigerate 15 minutes.

Take the dough out of the refrigerator. It should have firmed up a bit. Prick with a fork. Line the tart shell with aluminum foil and then fill with pie weights (dried beans make good pie weights if you want to use something from around the house).

Bake the pie crust at 350° for 8–10 minutes.

Out of the oven, remove foil and weights, and cook an additional 8–10 minutes. When done, the edges of the tart will start to pull away from the tart pan.

Let the crust cool completely on a pie rack in the tart pan while preparing the filling.


 Make the chocolate ganache filling and assemble the tart:
Ingredients:

1 cup whippng cream (cold)
10 oz. bittersweet chocolate (70% cocoa)
1/2 cup chocolate hazelnut spread*
1/4 tsp salt
1/2 tsp vanilla
1 cup hazelnuts, chopped**

*Nutella brand works well because it contains sugar. If using another brand, taste the mixture and add sugar as needed.

**If you buy whole hazelnuts, prepare as follows: roast whole nuts about 8–10 minutes at 350°, put into a small brown paper bag, and rub to remove as much of the brown “skin” as possible. Chop coarsely with a knife or a nut chopper/grinder device if you have one.

Method to make the filling:

Heat the whipping cream in a small saucepan until it just reaches a boil, and immediately pour over the finely chopped chocolate. (Use a heat-proof glass or CorningWare bowl for this step.)

Mix with a whisk until the chocolate has melted.

Add hazelnut spread, salt, and vanilla, and whisk again.

Whisk in the chopped hazelnuts. Keep mixing. The filling will start to thicken more and more as it cools.

Pour immediately into the cooled pie crust.

Refrigerate until the filling sets.

Take out of the refrigerator 30 minutes or so before serving to let the filling and crust soften a bit at room temperature.

Serve individual slices garnished with whipped cream and raspberries if desired.


Homemade whipped cream:
Ingredients:
(1 cup of whipping cream will serve about 4 people)

1 cup whipping cream (chilled)
1 Tbsp confectioner’s sugar
1 tsp vanilla

Method to make fresh whipped cream:

It is a snap to make whipped cream if all bowls/whisks/beaters and the cream is cold to start. In fact, be careful, because it is easy to overbeat and then you will end up with butter!

This whipped cream has a very light, not-too-sweet taste. More sugar and vanilla can be added as desired, or even a splash of liquor.

Chill a large bowl and the beaters in the freezer before starting.

Take the whipping cream directly from the refrigerator and pour 2 cups into your chilled bowl.

Add the confectioner’s sugar and vanilla and mix together with a fork to dissolve.

Hand mix very briskly with a whisk, or set your electric or standing mixer to medium and begin to whip the cream/sugar mixture.

Gradually increase the speed of your mixer as you continue beating the whipping cream.

Stop every couple of minutes to test the whipped cream. Near the end, as the whipping cream thickens, slow the mixer down and watch carefully.

When almost done, it will start to form a pattern of “ridges” in the bowl as you move your electric hand mixer back and forth. Lift up your beaters at this point. The whipped cream will cling to the beaters and make a soft peak that stands up when done.

—Kathryn Occhipinti 

Privacy notice: Companies affiliated with this site may use cookies.  If you want to learn how to disable or block cookies, see this link:  https://www.google.com/search?q=How+to+block+cookies&oq=How+to+block+cookies&aqs=chrome..69i57.2864j0j7&sourceid=chrome&ie=UTF-8


Best Kathy Twitter Pic edited for blogKathryn Occhipinti, MD, is the author of the
Conversational Italian for Travelers
 series of books and a teacher of Italian for travelers to Italy in the Peoria and Chicago area.
“Everything you need to know to enjoy your visit to Italy!”

Join my Conversational Italian! Facebook group and follow me on Twitter at StellaLucente@travelitalian1  and start to learn Italian today for FREE!
Conversational Italian! Facebook Group
Tweet @travelitalian1 for Stella Lucente Italian

YouTube videos to learn Italian are available from © Stella Lucente, LLC.
Learn Conversational Italian.

More information on and photographs of Italy can be found on Facebook Stella Lucente Italian and Pinterest Stella Lucente Italian.
Facebook Stella Lucente Italian

Pinterest Stella Lucente Italian

Visit learntravelitalian.com/download.html to purchase/download Conversational Italian for Travelers and find more interesting facts and helpful hints about getting around Italy! Learn how to buy train tickets online, how to make international and local telephone calls, and how to decipher Italian coffee names and restaurant menus, all while gaining the basic understanding of Italian that you will need to know to communicate easily and effectively while in Italy. —From the staff at Stella Lucente, LLC

Italian Chocolate Hazelnut Tart

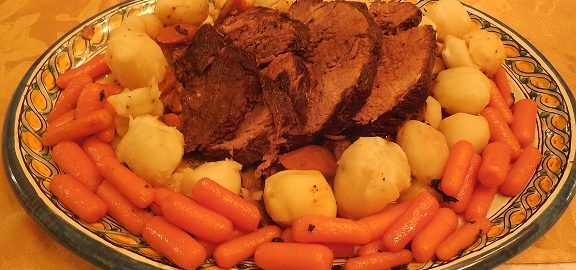
Sliced Italian pot roast

Italian Pot Roast in Barolo Wine for Sunday Dinner

Italian Pot Roast in  Barolo Wine for Sunday Dinner

Best Kathy Twitter Pic edited for blog Italian Pot Roast in Barolo Wine

The most moist and flavorful pot roast is Italian—and easy to make! Try it for a special Sunday dinner.

Try Italian Pot Roast in Barolo Wine for YOUR Sunday Dinner! 

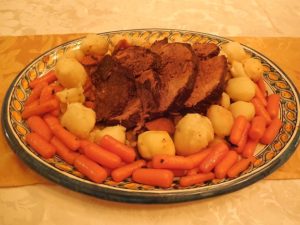
“Do Italians really make pot roast?” I am happy to share not only that Italians do make pot roast, but also that Italian-style pot roast is the most moist and flavorful pot roast I’ve ever tasted!

When I lived in San Francisco, I discovered the wonderful way that Northern Italians from the Lombardy region have with pot roast. They braise their pot roast slowly, under low heat for many hours, with a full-bodied northern Italian red wine called Barolo wine. With this method, the meat becomes melt-in-your-mouth soft and delicious. If you can’t find the Barolo wine that is typical of Northern Italy, Barbera wine or any hearty Italian red wine will do.

I’ve been making Italian pot roast in red wine for many years now, usually as a special treat for Sunday dinners with my family. The nice thing about the Italian red wine method is that the meat is even more flavorful if reheated; with this in mind, the dish is traditionally prepared the day before serving. Cook the meat until it is almost done, then reheat and finish in about an hour’s time for your special dinner the next day. And don’t worry—there is virtually no way to overcook pot roast with this method!

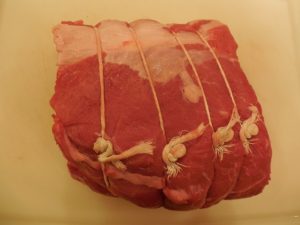
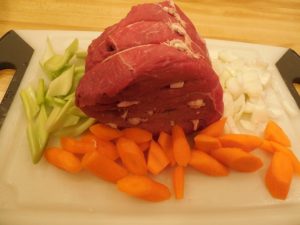
For the Italian pot roast recipe below, you will need a 3 lb. top round or rump round cut of beef. Ask your butcher to tie your meat with butcher’s twine, so the roast will stay intact as it cooks. Or, if you’d like to try to tie the meat yourself, click on the link to a master chef’s video from Le Cordon Bleu.

The recipe below also calls for “larding” the meat. This is an old method, whereby salt pork is inserted into tough cuts of meat to yield more tenderness and flavor. Nowadays, salt pork can be hard to find. And although larding is not absolutely necessary, I find that when I use a minimally processed bacon fat—no smoke, salt, or other flavorings added—this little bit of added fat does seem to help keep the roast moist during the long braising time. I have provided below a simple method for larding meat with kitchen utensils found in most homes. If you are interested in a special larding gadget and watching the larding process in real time, click on this video: Tescoma Presto Larding Needle.

Of course, you may add a vegetable side dish (contorno) to your pot roast meal. Northern Italy is the home of polenta, which would make a wonderful accompaniment. Small boiled potatoes and cut carrots are also nice to frame your roast when you present it on a serving dish.

And don’t throw away the vegetables that have been braising with the roast—those onions, carrots, and celery may have an unappealing brownish color, but they will also have developed a wonderful sweetness. Serve as a garnish to top the pot roast slices when they are plated. Ladle the finished slices with the warm pot roast juices and enjoy!  Kathryn Occhipinti


Italian Pot Roast in Barolo Wine 

Italian pot roast
Italian pot roast with potatoes and carrots


Ingredients
            for the Pot Roast:           

1 (3 lb.) top round of beef,  tied with butcher’s twine
6 strips natural, uncured, unsalted bacon
1 or 2 large cloves of garlic,
with the second clove sliced lengthwise into several thin slices
1/4 cup butter
1/4 cup olive oil
1 whole, dried clove
1 onion, chopped coarsely
3 carrots, sliced diagonally into thick slices
2 stalks of celery, sliced diagonally into thick slices
1 cup Barolo wine, Barbera wine, or any full-bodied Italian red wine
1/4 cup tomato paste

Ingredients
     for the Vegetable Garnish

1 lb. of small red or yellow potatoes
1 lb. of carrots, cut into serving pieces
Fresh parsley


Method

Prepare the meat and vegetables:

Prepare your top round or rump round meat by rinsing, patting dry, and then tying with butcher’s twine, if the butcher has not already done this for you.

Pot roast Italian style
Top round cut tied with butcher’s twine

Lard the meat by making holes lengthwise through the roast and then pushing a strip of fat from the bacon through each hole. One of my steel barbecue skewers cuts through the meat nicely and makes a hole about the right size. I use my fingers and, if necessary, my knife sharpener or the dowel of a wooden spoon to push the fat through. A special larding device, of course, does the job easily and quickly (see above for the link).

Rub the meat all over with the garlic. If you like, make additional small cuts with a paring knife and insert small slices of garlic into the meat.

Pot roast larded with garlic
The top round is turned on its end and larded. Small pieces of garlic have been inserted as well.

Cut up your vegetables, so all is ready to go before you start to cook.

Pot roast with vegetables
Top round tied, larded, and surrounded by chopped vegetables ready for the pot.


Cook your pot roast:

Heat the butter and oil together under low heat in a deep, heavy pan. Use an oven-proof pan or pot if you have one. (Or you can transfer to a pot suitable for the oven later.)

When the butter has melted, add the pot roast and brown the meat under medium heat, turning the meat with tongs so that each side browns nicely.

After the meat has browned completely, add the clove, onions, carrots, celery, and wine, with 1 cup of water.

If you are making this dish on the stovetop, cover and cook slowly under low to medium heat, so the liquid is kept at a simmer.

 -or-

If you have an oven-proof pan, I find it easier to transfer the pan to the oven and cook at 325°. If you do not have an oven-proof pan, you can move the pot roast from the pan into a pot, but be sure to scrape the bottom of the original pan with a wooden spoon so the liquid contains all of the good-tasting browned pieces from the bottom. Then pour the liquid over the pot roast.

The pot roast should cook gently for 3 hours. During that time, every 30 minutes or so, uncover briefly, turn the pot roast gently, and baste it in its juices.

After 3 hours, add the tomato paste diluted in 1/2 cup of water. You may need to add additional water to the pot if some has evaporated and the juices become too thick.

Continue cooking and braising as above for another 2 hours.

The cooking process can be stopped at this time. The meat should be tender enough to flake easily when tested with a fork along one of the corners. If not, continue to cook for an additional hour or so.

When the meat is done cooking, it is traditional to leave the meat in the pot with the juices and cooking vegetables until the next day, then reheat an additional 30 minutes to an hour or so before serving. (Refrigerate the pot roast until ready to cook for this final hour.)

While the pot roast is reheating, prepare your favorite vegetable to go with the meal. Polenta, small potatoes, and boiled or glazed cut carrots look nice surrounding the pot roast, but any favorite vegetable is fine.

Serve your pot roast:

Sliced Italian pot roast
Italian pot roast sliced and ready to serve

When you are ready to serve, take the pot roast out of its cooking pan and place it in the center of a platter. Remove the twine and cut into slices—before or after presenting at the table.

Strain the pan juices, and reserve the vegetables to place around the pot roast. They will look brown but should still have some shape and will taste very sweet.

Drizzle some of the pan juices over the pot roast and reserve the rest to serve in a gravy boat.

Surround your pot roast with prepared vegetables of your choice for the final presentation. Serve and enjoy!

Kathryn Occhipinti

Best Kathy Twitter Pic edited for blog

Kathryn Occhipinti, MD, is the author of the
Conversational Italian for Travelers
 series of books and a teacher of Italian for travelers to Italy in the Peoria and Chicago area.
“Everything you need to know to enjoy your visit to Italy!”

Join my Conversational Italian! Facebook group and follow me on Twitter at StellaLucente@travelitalian1  and start to learn Italian today for FREE!
Conversational Italian! Facebook Group
Tweet @travelitalian1 for Stella Lucente Italian

YouTube videos to learn Italian are available from © Stella Lucente, LLC.
Learn Conversational Italian.

More information on and photographs of Italy can be found on Facebook Stella Lucente Italian and Pinterest Stella Lucente Italian.
Facebook Stella Lucente Italian

Pinterest Stella Lucente Italian

Visit learntravelitalian.com/download.html to purchase/download Conversational Italian for Travelers and find more interesting facts and helpful hints about getting around Italy! Learn how to buy train tickets online, how to make international and local telephone calls, and how to decipher Italian coffee names and restaurant menus, all while gaining the basic understanding of Italian that you will need to know to communicate easily and effectively while in Italy. —From the staff at Stella Lucente, LLC

Italian Pot Roast in Barolo Wine

Sicilian Christmas cookies

Cuccidati: Traditional Sicilian Christmas Cookies

Cuccidati: Traditional Sicilian Christmas Cookies 

Kathryn for learntravelitalian.comCuccidati are traditional Sicilian Christmas cookies—try my family recipe enjoyed for three generations here in America!

Cuccidati: Traditional Sicilican Christmas Cookies

Italian Christmas traditions are unique to each region of the Italy and have been lovingly handed down within families through the generations. Cuccidati – a version of Christmas cookie that probably originated after the Arabs introduced oranges and almonds to Sicily centuries ago – play an important part in the Christmas celebration in Sicily even today.

All Sicilian cuccidati, or any Italian cookie for that matter, are unlike what Americans think of when they think of cookies. Most Italian cookies are made from dough that cooks up drier than American cookies and there is much more variation in the presentation.  Sicilian cookies come in a multitude of different shapes and sizes and fruit fillings are often enclosed in the cookies as a special treat.

The recipe given below is for a Sicilian Christmas cookie—my family calls them “cuccidati,” although they are not identical to most of the cookies found online under this name.  The cookies in this recipe start out as the “typical” cuccidati: one long “tube” of sweet, Italian pie-crust-like dough, which contains a dried fruit and nut center. (No figs in our version, by the way.) But, instead of then cutting the tube into bite-sized pieces that are finished with icing, my family cuts larger pieces, which are then formed into different shapes, and finishes the cuccidati with a sprinkle of powdered sugar.  Whatever the name, this is just one version out of many dried, fruit-filed cookies still made in Sicilian bakeries today to celebrate the Christmas season.

When I was a child, my family always gathered the weekend before Christmas to share our creativity while we formed our cuccidati into wreaths, ribbons, or candy cane-like forms.  They could be completely covered in dough, which would allow for a creative, fringe-like covering, or left open.  The sides could be pinched for decoration if like, similar to how Americans form a pie crust along the rim of their pies. If you would like to see how the various shapes of these cookies are made, visit the Stella Lucente Italian Pinterest site.

The ingredients for the cuccidati filling are considered easy to come by today, but remember that dried fruit, including raisins and oranges and spices like cinnamon were considered special when the cookies originated.  These filling ingredients were only found only in well-off households. Since the filling ingredients are difficult to chop and mix together, in some Sicilian towns “back in the day,” people would bring their filling to the butcher to mix together for them in his meat grinder, which had been newly cleaned for the season for this purpose.

Despite the few ingredients in traditional cuccidati, and the difficulty of making the filling with them, the dried fruit has a rich sweetness, the roasted almonds a robust flavor, and the cinnamon, orange, and citron add a complexity of flavor that goes beyond its simple ingredients. Try our recipe this Christmas season for a taste of Sicilian tradition!
—Kathryn Occhipinti


Cuccidati
Traditional Sicilian Christmas Cookies

Sicilian Christmas cookies
Cuccidati sprinkled with confectioner’s sugar and ready to eat

Ingredients
If you’re trying this recipe for the first time, it may be easier to cut the recipe in half.  
Makes 2–4 dozen cookies, depending on the size and shape of the cookies created.

Pasta Frolla (Sweet Pastry)
2½ lbs. flour (about 10 cups)
10 oz. of lard or Crisco
½ cup sugar
½ tsp salt
about 1 cup cold water

Filling
2 lbs. yellow raisins (not red raisins)
1 lb. whole almonds (skinless), roasted
2 Tbsp citron (lemon)
2 Tbsp candied orange peel
or zest of 2 tangerines
2 tsp cinnamon sugar


Procedure

Prepare the pasta frolla*

Sift the flour, salt, and sugar into a bowl.

Cut in the lard with a fork and/or your fingertips until it is the size of small peas.

Add the cold water a little at a time, while mixing with a fork. After about 1 cup of water has been added, gather the dough and test it to see if it holds together. If it does, form one large ball. If it is too dry, add more water, mix, and try again.

Turn the dough out onto a floured board and press it together with a soft, gentle kneading motion with the palm of your hand until a dough forms.

Form into one large disk, wrap in plastic wrap, and refrigerate for 30 minutes.


Make the filling

First, chop the yellow raisins coarsely with a sharp knife so they open up. This is fairly labor intensive, and it may take a bit of time to chop all of the raisins.

Then, chop the almonds coarsely with a sharp knife.

If you have a small manual chopper/grinder specifically for nuts, put the coarsely chopped nuts into the machine and grind to obtain more finely chopped nuts, which can then be mixed with the raisins. Otherwise, try one of the next two steps below.

Either: Take the tenderizing part of a meat mallet and mash small amounts of the raisins and almonds together at a time. This can be done under a dish towel so they do not scatter everywhere. (Mashing the raisins and almonds together seems to work the best and will leave varying sizes of raisins and almonds in the mix.)

Or: An alternative to the last step: pulse the pre-processed raisins and nuts in a food processor a few times if you have one, making sure the ingredients are not over processed.

To the raisin/nut mixture: add the citron, orange peel or zest, and cinnamon and mix well.

Form into 2 rectangular “logs” the shape of a loaf of bread. Cover with aluminum foil if not using right away and store at room temperature.

Filling for cuccidati
Cuccidati filling formed into logs


Assemble the cuccidati

Set up a kitchen table “assembly line” style: place the dough on one end on a surface that is good for rolling and cutting the dough, place the filling in the middle, and use the surrounding work areas for each member of the family to create the cookies. Place cookie sheets on the far end for the finished cookies.

Cuccidati work table
Table set up for assembling the cuccidati

Cut off one strip at a time from the large dough ball and roll it out into pie-crust-size thickness.

Cut the rolled-out dough into fairly thick strips, depending on the size of cookie desired. These strips can then be cut again crosswise to make the size needed to make smaller cookies.

Cut rectangular pieces of filling from the filling logs to place into the strips of dough.

Be creative! Create cookies with the sides brought up to cover the filling entirely, or leave the filling uncovered and just pinch the dough together to form various designs. Traditional shapes are round (like a wreath), horseshoe, or long or short ribbons. Candy cane shapes are popular with kids.

Sicilian cuccidati
Cuccidati ready to bake – various shapes


Bake in preheated oven at 350° for about 20–30 minutes, or until the bottom of the cookie is nicely browned. The sides and top of the dough should be cooked but not browned. This will make a flaky crust and avoid burning the filling.

Sprinkle with confectioner’s sugar when cool.

Cookies will keep for about 2 weeks in a cookie tin or covered with aluminum foil.

*The original recipe passed down from my grandmother states that the flour and the lard should be mixed together and left overnight before the sugar, salt, and water are added to create the dough. I’ve never tried this and instead use the traditional “pie crust” method.

 —Kathryn Occhipinti: Adapted from the cooking classes given by the Italian-American Society of Peoria

Best Kathy Twitter Pic edited for blog

Kathryn Occhipinti, MD, is the author of the
Conversational Italian for Travelers
 series of books and a teacher of Italian for travelers to Italy in the Peoria and Chicago area.
“Everything you need to know to enjoy your visit to Italy!”

Join my Conversational Italian! Facebook group and follow me on Twitter at StellaLucente@travelitalian1  and start to learn Italian today for FREE!
Conversational Italian! Facebook Group
Tweet @travelitalian1 for Stella Lucente Italian

YouTube videos to learn Italian are available from © Stella Lucente, LLC.
Learn Conversational Italian.

More information on and photographs of Italy can be found on Facebook Stella Lucente Italian and Pinterest Stella Lucente Italian.
Facebook Stella Lucente Italian

Pinterest Stella Lucente Italian

Visit learntravelitalian.com/download.html to purchase/download Conversational Italian for Travelers and find more interesting facts and helpful hints about getting around Italy! Learn how to buy train tickets online, how to make international and local telephone calls, and how to decipher Italian coffee names and restaurant menus, all while gaining the basic understanding of Italian that you will need to know to communicate easily and effectively while in Italy. —From the staff at Stella Lucente, LLC

Cuccidati: Traditional Sicilian Christmas Cookies

Italian manicotti

Italian Recipe: Manicotti from Mamma Rosa

Italian Recipe: Manicotti from Mamma Rosa

Best Kathy Twitter Pic edited for blog ManicottiItalian crespelle are crêpes stuffed with delicious ricotta cheese!

Italian Recipe: Manicotti from Mamma Rosa

Manicotti (pronounced (man-ee-cot-tee) are Italian crêpes, called crespelle, filled with cheese, topped with just a bit of sauce, and baked. They are a perfect light start  as the “primo”(first) course for a special Italian meal. Because making the crespelle is a bit labor intensive—they have to be made one by one—we don’t often have manicotti at my house. I made these at home this past Easter for dinner, so I thought I would share the method.

A few words about what are called manicotti in America. Many of you have no doubt tasted manicotti made with pasta tubes in an Italian-American restaurant or have seen manicotti pasta tubes in the grocery store. And yes, the pasta tubes are about the same size as the “tubes” we will make when we roll up our crespelle. And yes, our filling will work well in these pasta tubes or large pasta shells for a quick meal. But for true manicotti made the southern Italian way, as passed down by my Mamma Rosa, the shells must be light crespelle, not made from boiled pasta.

Also, I have to say that I completely forgot that manicotti can be topped with sauce and a bit of grated mozzarella cheese. But please (I am begging here), please do not “drown” your manicotti in sauce or a pool of gooey mozzarella cheese, as some restaurants do. Then the crespelle will become soggy, and you will not be able to taste the delicate flavors of the cheese filling!

To see the method to make Italian crespelle in real time, watch our Stella Lucente Italian You Tube Channel. Visit the Learn Travel Italian Pinterest site for photos of how to put together your own manicotti. Try our recipe and amaze your family with something new!
—Kathryn Occhipinti


Italian Recipe: Manicotti from Mamma Rosa 

Italian Manicotti
Two Manicotti baked and ready to serve.

Ingredients for Italian Recipe: Manicotti from Mamma Rosa
(Serves 4)

For the crespelle (crêpes)*
1 cup all-purpose flour
1 cup whole milk
1 egg
1 Tbsp olive oil

For the cheese filling
15 oz.  good, fresh Ricotta cheese**
6 oz. mozzarella (not buffalo mozzarella) cut into small cubes***
1 egg
1/2 tsp salt
1/8 tsp white pepper
2 Tbsp fresh parsley, minced, stems removed

For baking
1 jar (26 oz.) homemade or favorite tomato sauce

Make the crespelle batter

Put 1/2 cup of the milk and the rest of the ingredients into a mixing bowl.

Beat briskly with a whisk until all lumps of flour have dissolved. (This may take a little bit of time and produce small air bubbles if done thoroughly.)

Add the remaining 1/2 cup of milk and beat with the whisk again.

Let batter rest for 1 hour in the refrigerator. This will let any remaining particles of flour absorb into the batter and relax any gluten that may have formed during the mixing. The rest allows for a more tender and less “doughy” crespelle.

Method to cook the crespelle 

To cook the batter to make the crespelle, you will need a small frying pan that heats evenly and holds the heat well. A crêpe pan works best, of course!

The technique is a little tricky, and the crespelle must be cooked one at a time. But once the method is mastered, you should have a batch of about 8–10 crespelle in no time!

  1. Brush the pan with olive oil and then heat the pan over medium-high heat.
  2. Pour approximately 3 Tbsp of batter into the center of the pan.
  3. Off heat, tilt the pan around with a circular motion so that the batter thins out and forms a round crêpe about the size of the pan.
  4. Place the pan back on the heat again and cook until the edges of the crêpe become whitish and the inner portion yellow and partially solid.
  5. Using a spatula, flip once and cook briefly (about 30 seconds).
  6. Remove to a plate to cool.

Watch our video “How to Make Crespelle” on the Learn Travel Italian YouTube Channel.

Assemble the Manicotti

One at a time, place a crespelle on a separate plate and stuff with the ricotta mixture to make a manicotti as follows:

  1. Place the crespelle with the second side up (the side that cooked briefly after flipping) onto a plate or work board.
  2. Place 1–2 Tbsp of ricotta filling in a line down the middle.
  3. Fold one side of the crespelle over to the center.
Manicotti crespelle
One side of a crespelle folded over the ricotta cheese filling.

Repeat with the other side and overlap to make a tube shape with open ends, similar to a large penne pasta. Seal the overlapping edges in the center with a drop of water.

Have a baking pan ready with a layer of spaghetti sauce on the bottom.

Place the manicotti into the pan.

Continue to make manicotti and place them into the pan, making as many rows as possible to fill up the pan.

When the pan has been filled, pour a bit of your favorite tomato sauce to make a “line” of sauce over the center of each row of manicotti.  Don’t put too much sauce over the manicotti, or the crespelle will become soggy.

Italian manicotti
Finished manicotti topped with tomato sauce in a pan ready to put into the oven to bake.

Above all, please don’t drown your manicotti in mozzarella cheese! If you like, put a small amount of shredded mozzarella over the top of the sauce line.

Bake in a 350° oven about 15–20 minutes, or until the mozzarella cheese has melted and the manicotti have crisped a bit.

Serve with tomato sauce on the side.

*There are, of course, many variations on how to make crespelle batter. Some use more egg or less flour. Others don’t use olive oil. I’ve found that the recipe for crespelle batter given above works the best with the pan that I have available at home. If adding more egg, the batter may stick to the pan. Less flour makes a watery batter that is a little difficult to deal with without a true crêpe maker. If you have a favorite crêpe batter, you can use that, although crespelle are traditionally a little bit thicker than crêpes.

 **This dish showcases how delicious ricotta cheese can be. So please use only creamy, fresh, good quality ricotta cheese, from a specialty store if possible.

*** For the mozzarella cheese, the hard mozzarella cheese holds up better and has more flavor to add to the dish than buffalo mozzarella. The slightly nutty flavor of fontina cheese is also wonderful in this filling, although it is not “authentic” because it is a northern Italian cheese, and the dish is southern Italian.  

—Adapted from Primi e Secondi Piatti Italian cookbook from the Italian-American Society of Peoria; recipe by Rose Schimmenti Occhipinti and Kathy Occhipinti

Best Kathy Twitter Pic edited for blog

Kathryn Occhipinti, MD, is the author of the
Conversational Italian for Travelers
 series of books and a teacher of Italian for travelers to Italy in the Peoria and Chicago area.
“Everything you need to know to enjoy your visit to Italy!”

Join my Conversational Italian! Facebook group and follow me on Twitter at StellaLucente@travelitalian1  and start to learn Italian today for FREE!
Conversational Italian! Facebook Group
Tweet @travelitalian1 for Stella Lucente Italian

YouTube videos to learn Italian are available from © Stella Lucente, LLC.
Learn Conversational Italian.

More information on and photographs of Italy can be found on Facebook Stella Lucente Italian and Pinterest Stella Lucente Italian.
Facebook Stella Lucente Italian

Pinterest Stella Lucente Italian

Visit learntravelitalian.com/download.html to purchase/download Conversational Italian for Travelers and find more interesting facts and helpful hints about getting around Italy! Learn how to buy train tickets online, how to make international and local telephone calls, and how to decipher Italian coffee names and restaurant menus, all while gaining the basic understanding of Italian that you will need to know to communicate easily and effectively while in Italy. —From the staff at Stella Lucente, LLC

Italian Recipe: Manicotti from Mamma Rosa

Chicken in Marsala Wine Italian Style

One-Pot Italian Chicken in Marsala Wine

One-Pot Italian Chicken in Marsala Wine

Best Kathy Twitter Pic edited for blog Italian Chicken in Marsala Wine 

A delicious and easy to make family dinner. Try it tonight!

Try One-Pot Italian Chicken in Marsala Wine for YOUR Dinner Tonight! 

The recipe title, “One-Pot Italian Chicken in Marsala Wine” sounds rich… and it is! But it is also so easy to make! I am told that for many years in Italy, only relatively wealthy families had ovens (in the day of my great grandparents). As a result, many wonderful Italian meals were developed that could be made entirely on the stove top. This actually fits perfectly with the lifestyle we live today.

In this chicken in Marsala wine recipe, a whole cut chicken is cooked in one large skillet along with the wine and few other ingredients until a silky gravy forms. This hearty and fulfilling dish can be made during the week or served when friends are over on the weekend. Hearty, crusty Italian bread makes a perfect accompaniment. Add a salad or vegetable side dish (contorno) if you like.

So get out the largest skillet you have, and try our chicken in Marsala wine dish for your family tonight. I’m sure you won’t be disappointed! —Kathryn Occhipinti

Recipe is listed below.  Check out my  latest Instagram video from Conversationalitalilan.french and watch me make the dish if you like!


One-Pot Italian Chicken in Marsala Wine 

Ingredients

1 frying chicken, cut into 2 breasts, 2 thighs/legs, 2 wings
(any chicken with breasts and thighs of similar size)
up to 1/4 cup olive oil, as needed
1 small onion, minced
1 clove garlic, crushed
2 strips guanciale (bacon from cheek of pig) or
2 strips prosciutto, chopped
3/4 cup Marsala wine
8 oz. cremini mushrooms
1 (15 oz.) can chopped tomatoes or
canned or fresh cherry tomatoes
2 sprigs of Italian flat-leaf parsley, chopped coarsely

Method

Rinse the frying chicken inside and out, pat dry, and cut into pieces. Reserve the back for chicken soup to be made at a later date!

Sprinkle chicken lightly with salt and pepper.

Use a large, shallow pot, Dutch oven, or skillet to cook all ingredients over medium high heat as follows:

Pour olive oil into your pot or skillet to coat the entire bottom of the pot with a thin layer of oil, using  about 1/4 cup of olive oil. Heat oil over medium high heat (do not let the oil smoke or flavor will be lost).

Add chicken to the pan skin side down, keeping each piece separate from the other and cook without moving the chicken for a few minutes, until the skin has browned and some of the fat from under the skin has been rendered.

Turn chicken pieces once and cook about 5 minutes more.

Remove chicken pieces to a platter and cover with foil to keep warm.

Pour out excess oil/fat from the skillet. Add fresh olive oil if necessary to coat the bottom lightly again.

Into the skillet, add the chopped onion, crushed garlic clove, and guanciale or prosciutto. Cook until the onion has softened.

Add Marsala wine and turn the heat up to high briefly to boil off alcohol while scraping the bottom of the pan with a wooden spoon to release chicken bits that will help flavor the sauce. Lower heat and continue to boil off alcohol until about 50% of the Marsala wine remains in the pot.

Put the chicken back into the skillet and add tomatoes (with the juices in the can), mushrooms, and parsley. Add enough water, so the chicken and vegetables are almost completely covered.

Chicken in Marsala Wine
Browned chicken with vegetables and Marsala wine on the stove top

Cover the skillet and cook on medium high heat until the chicken is cooked through, adding more water as needed, about 15 to 30 minutes (this will depend on how cooked the chicken was initially, of course).

Chicken in Marsala Wine Italian style
Italian chicken in Marsala wine with tomatoes added, cooking on the stove top

If the sauce is too watery at the end of cooking time, remove the lid and boil off some liquid gently. The sauce should be fairly thick.*

Taste, and adjust salt and pepper before serving.

Place the chicken pieces on a large platter or on individual plates. Pour on the sauce and serve with rustic Italian bread.

Italian Chicken in Marsala Tomato Sauce
Italian chicken Marsala served with a side of bread

*This method is a fricassee of chicken (a method of cooking meat in which it is cut up, sautéed and braised, and served with its sauce), so the sauce will be a little fatty. If you want to decrease the amount of fat, the same method can be followed with skinless, bone-in chicken cooked for a shorter time initially.

Kathryn Occhipinti


Best Kathy Twitter Pic edited for blog

Kathryn Occhipinti, MD, is the author of the
Conversational Italian for Travelers
 series of books and a teacher of Italian for travelers to Italy in the Peoria and Chicago area.
“Everything you need to know to enjoy your visit to Italy!”

Join my Conversational Italian! Facebook group and follow me on Twitter at StellaLucente@travelitalian1  and start to learn Italian today for FREE!
Conversational Italian! Facebook Group
Tweet @travelitalian1 for Stella Lucente Italian

YouTube videos to learn Italian are available from © Stella Lucente, LLC.
Learn Conversational Italian.

More information on and photographs of Italy can be found on Facebook Stella Lucente Italian and Pinterest Stella Lucente Italian.
Facebook Stella Lucente Italian

Pinterest Stella Lucente Italian

Visit learntravelitalian.com/download.html to purchase/download Conversational Italian for Travelers and find more interesting facts and helpful hints about getting around Italy! Learn how to buy train tickets online, how to make international and local telephone calls, and how to decipher Italian coffee names and restaurant menus, all while gaining the basic understanding of Italian that you will need to know to communicate easily and effectively while in Italy. —From the staff at Stella Lucente, LLC

One-Pot Italian Chicken in Marsala Wine